


to do list (Admin only)
Branches Creation: RaKis not Rachis connotation! Will need to be edited in, Dennis will send me a 1 second clip (need to find timestamp in Davinci)
This can be found in the "Creating Our Branches" video
LESSON OVERVIEW
Whenever we want to create a piece of foliage, starting the process is by creating our textures not by creating our meshes. Foliage works a little bit different in the way that because of their size, the amount that they are used in we can't usually rely on just creating them out of geometry.
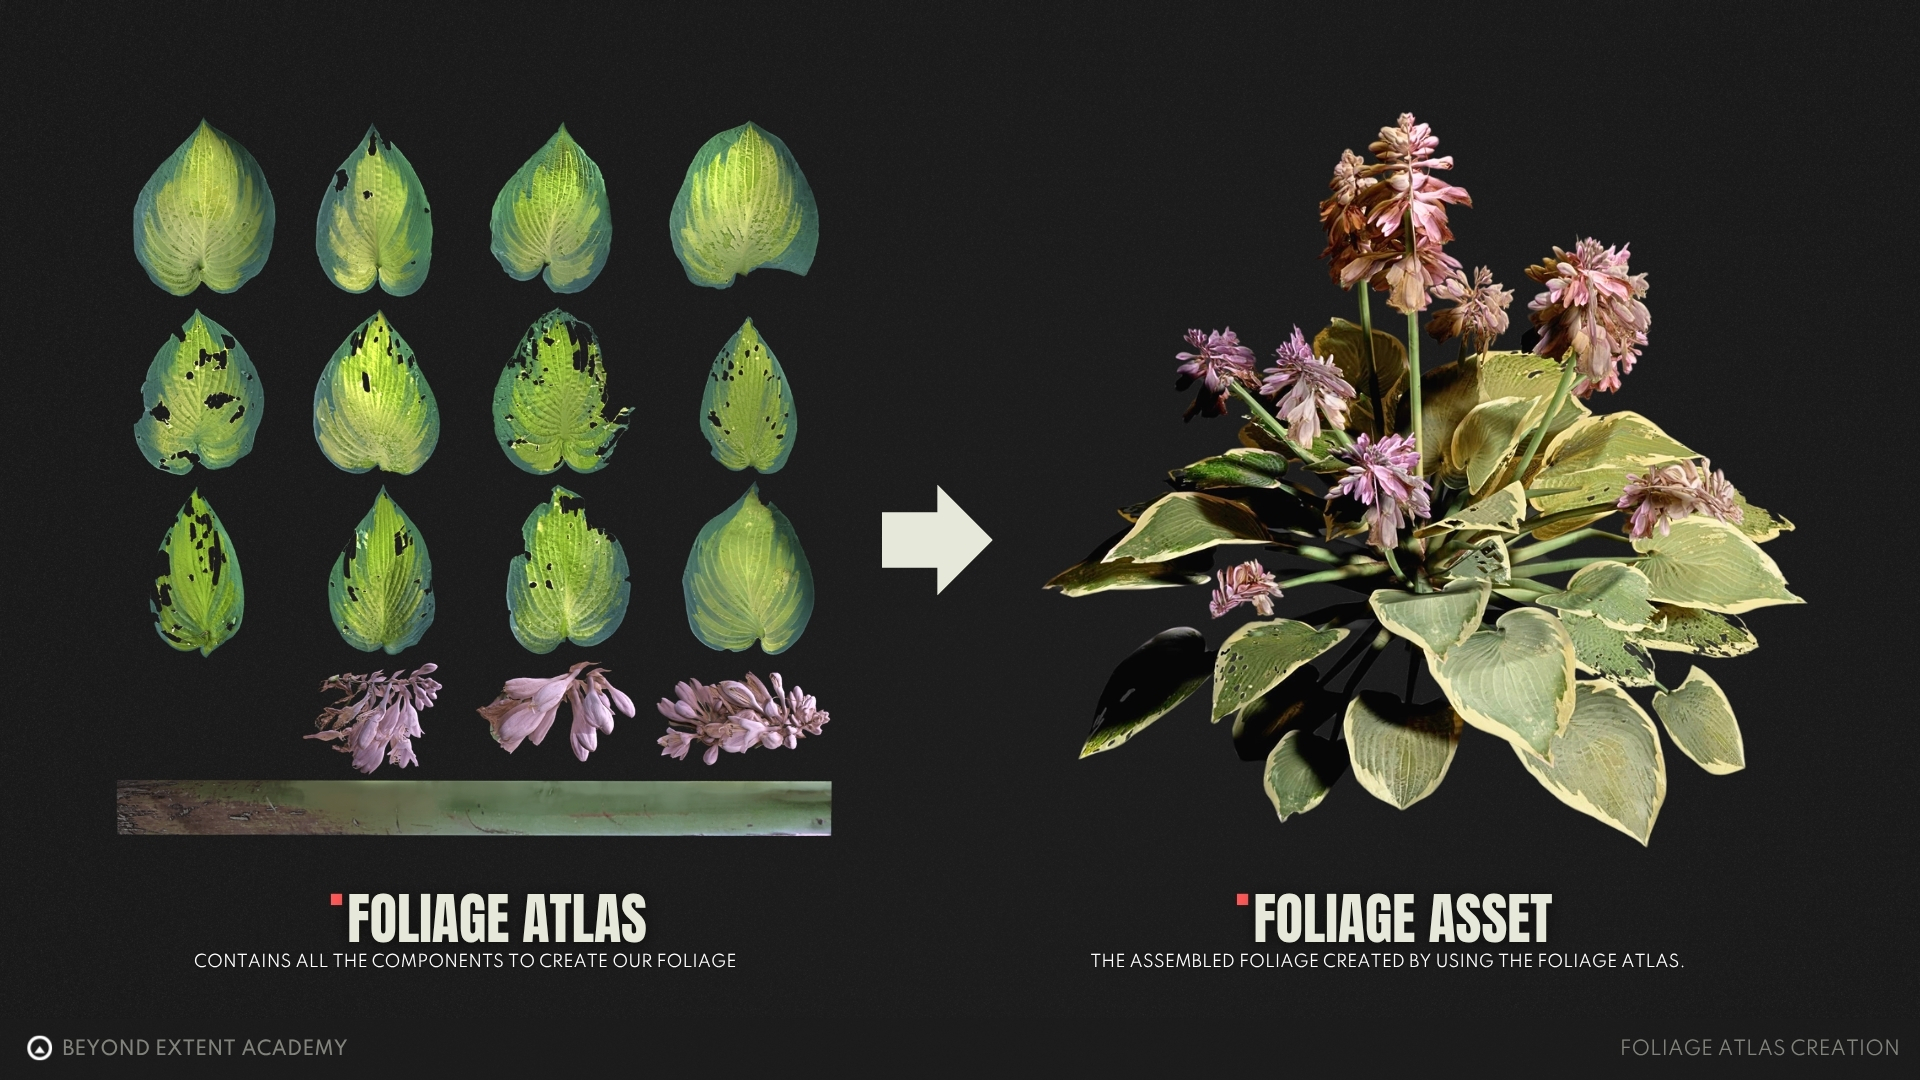
That's why we are creating our foliage atlas first, this will contain all the texture information we can then use to make our entire tree out of.
This lesson will teach you on how to start creating your own foliage atlas, that can then be used when creating any piece of foliage.
⚠️
Missing LESSON OVERVIEW
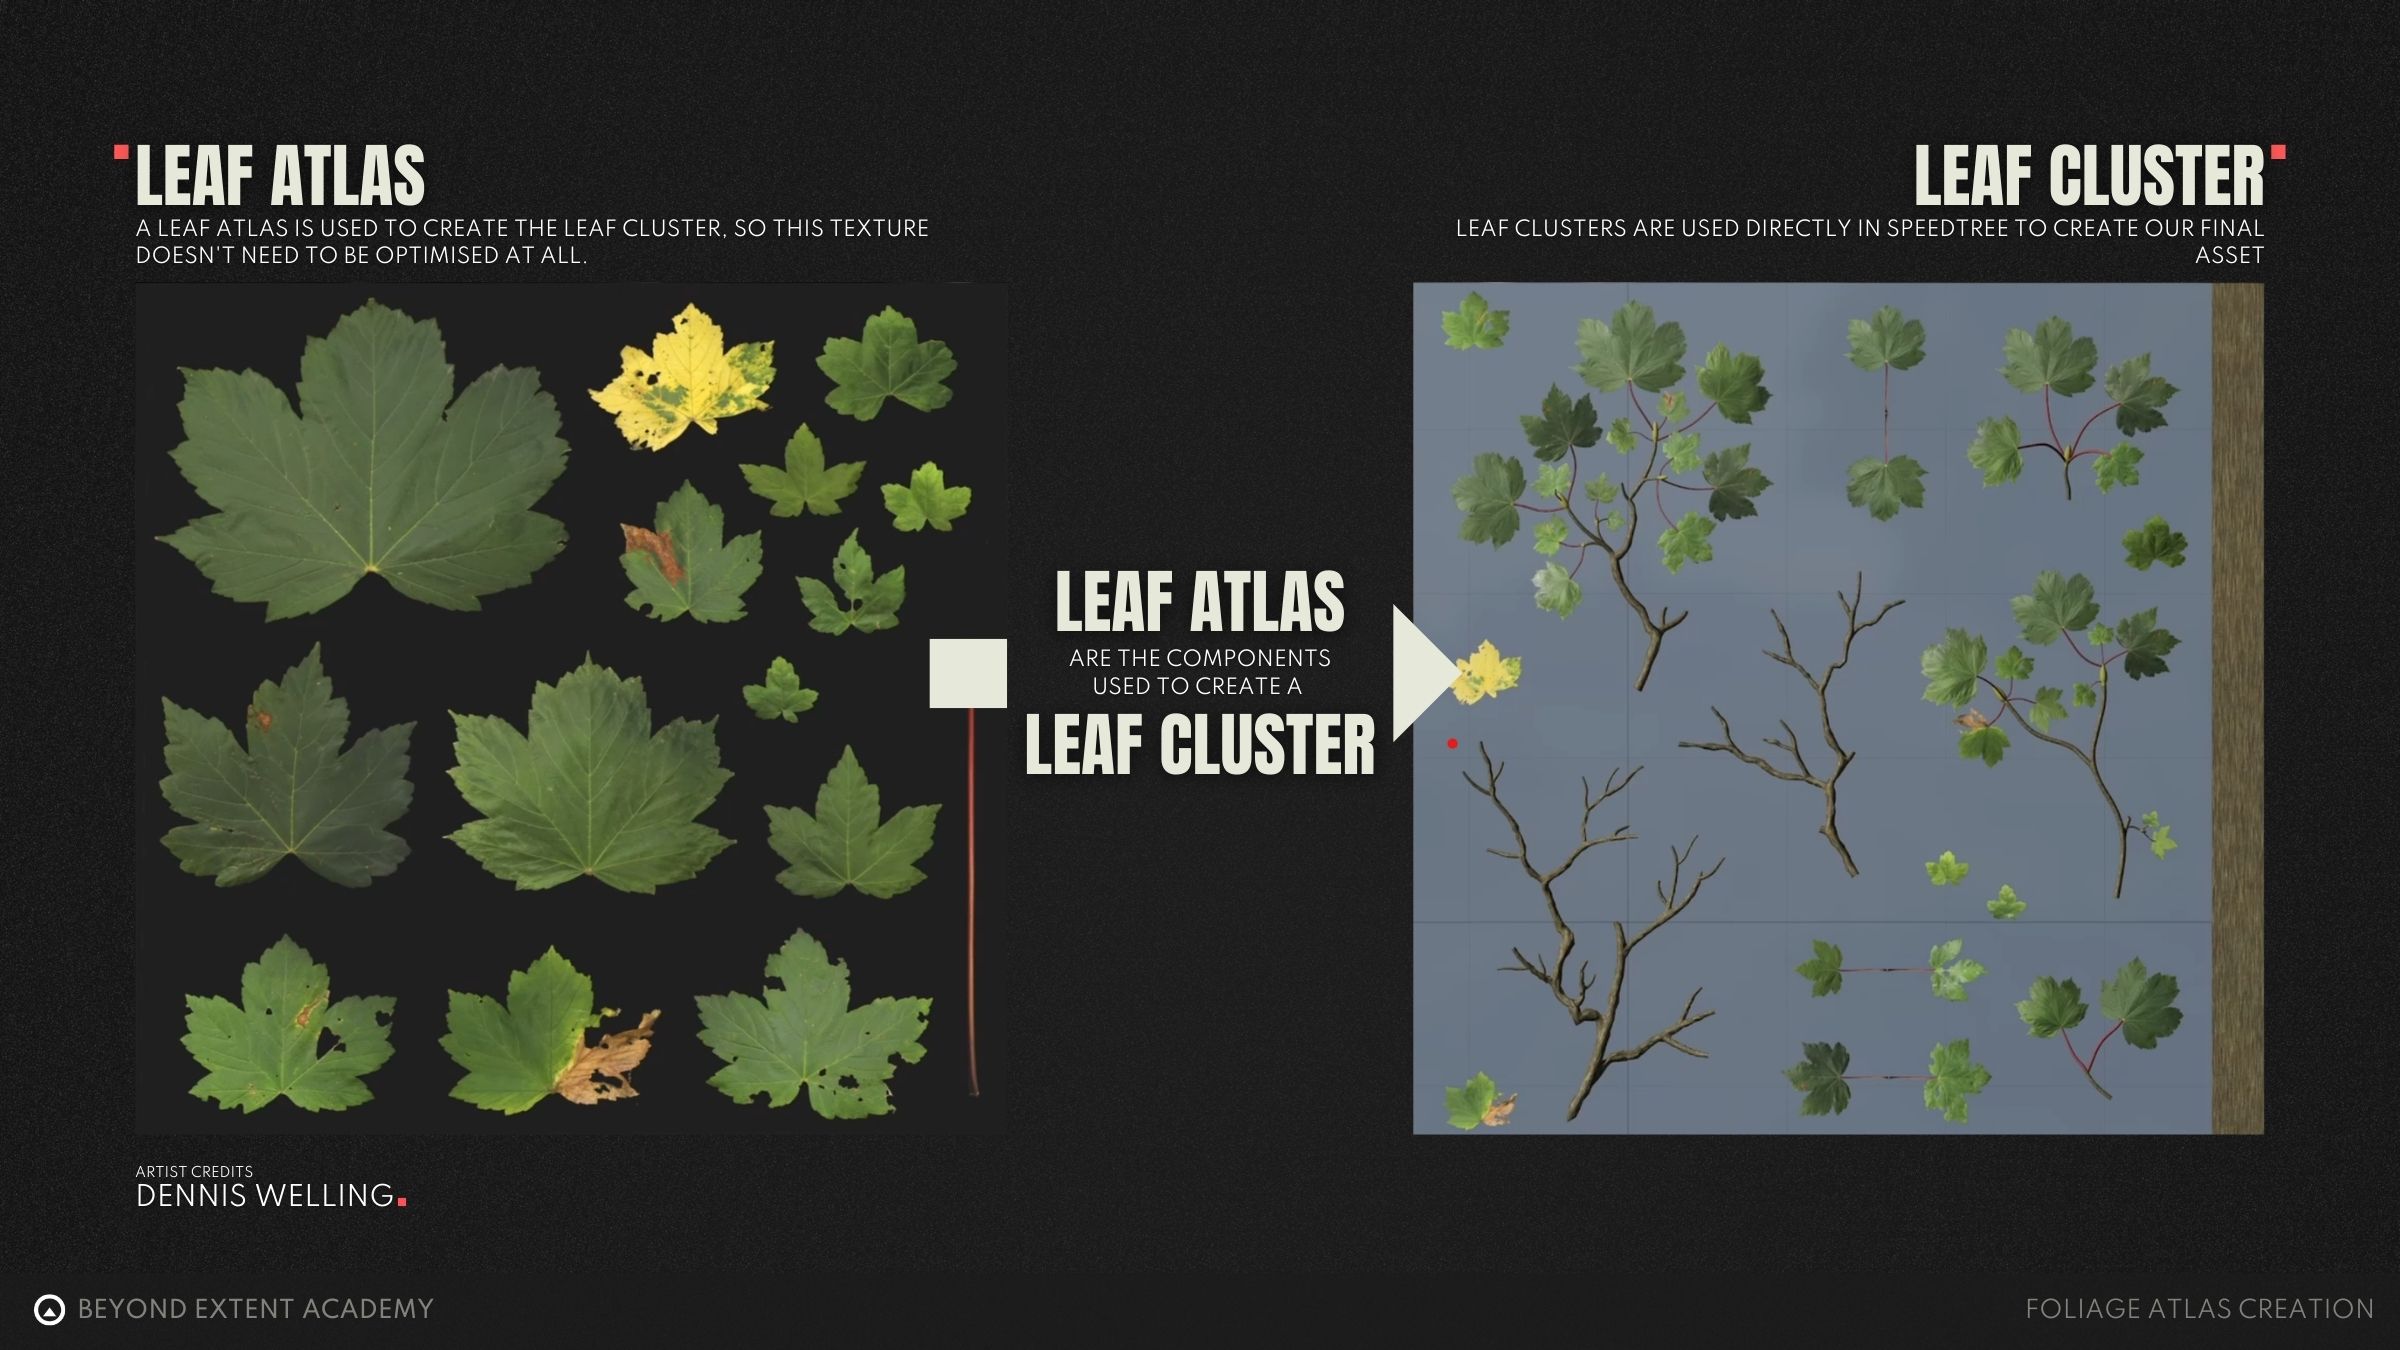
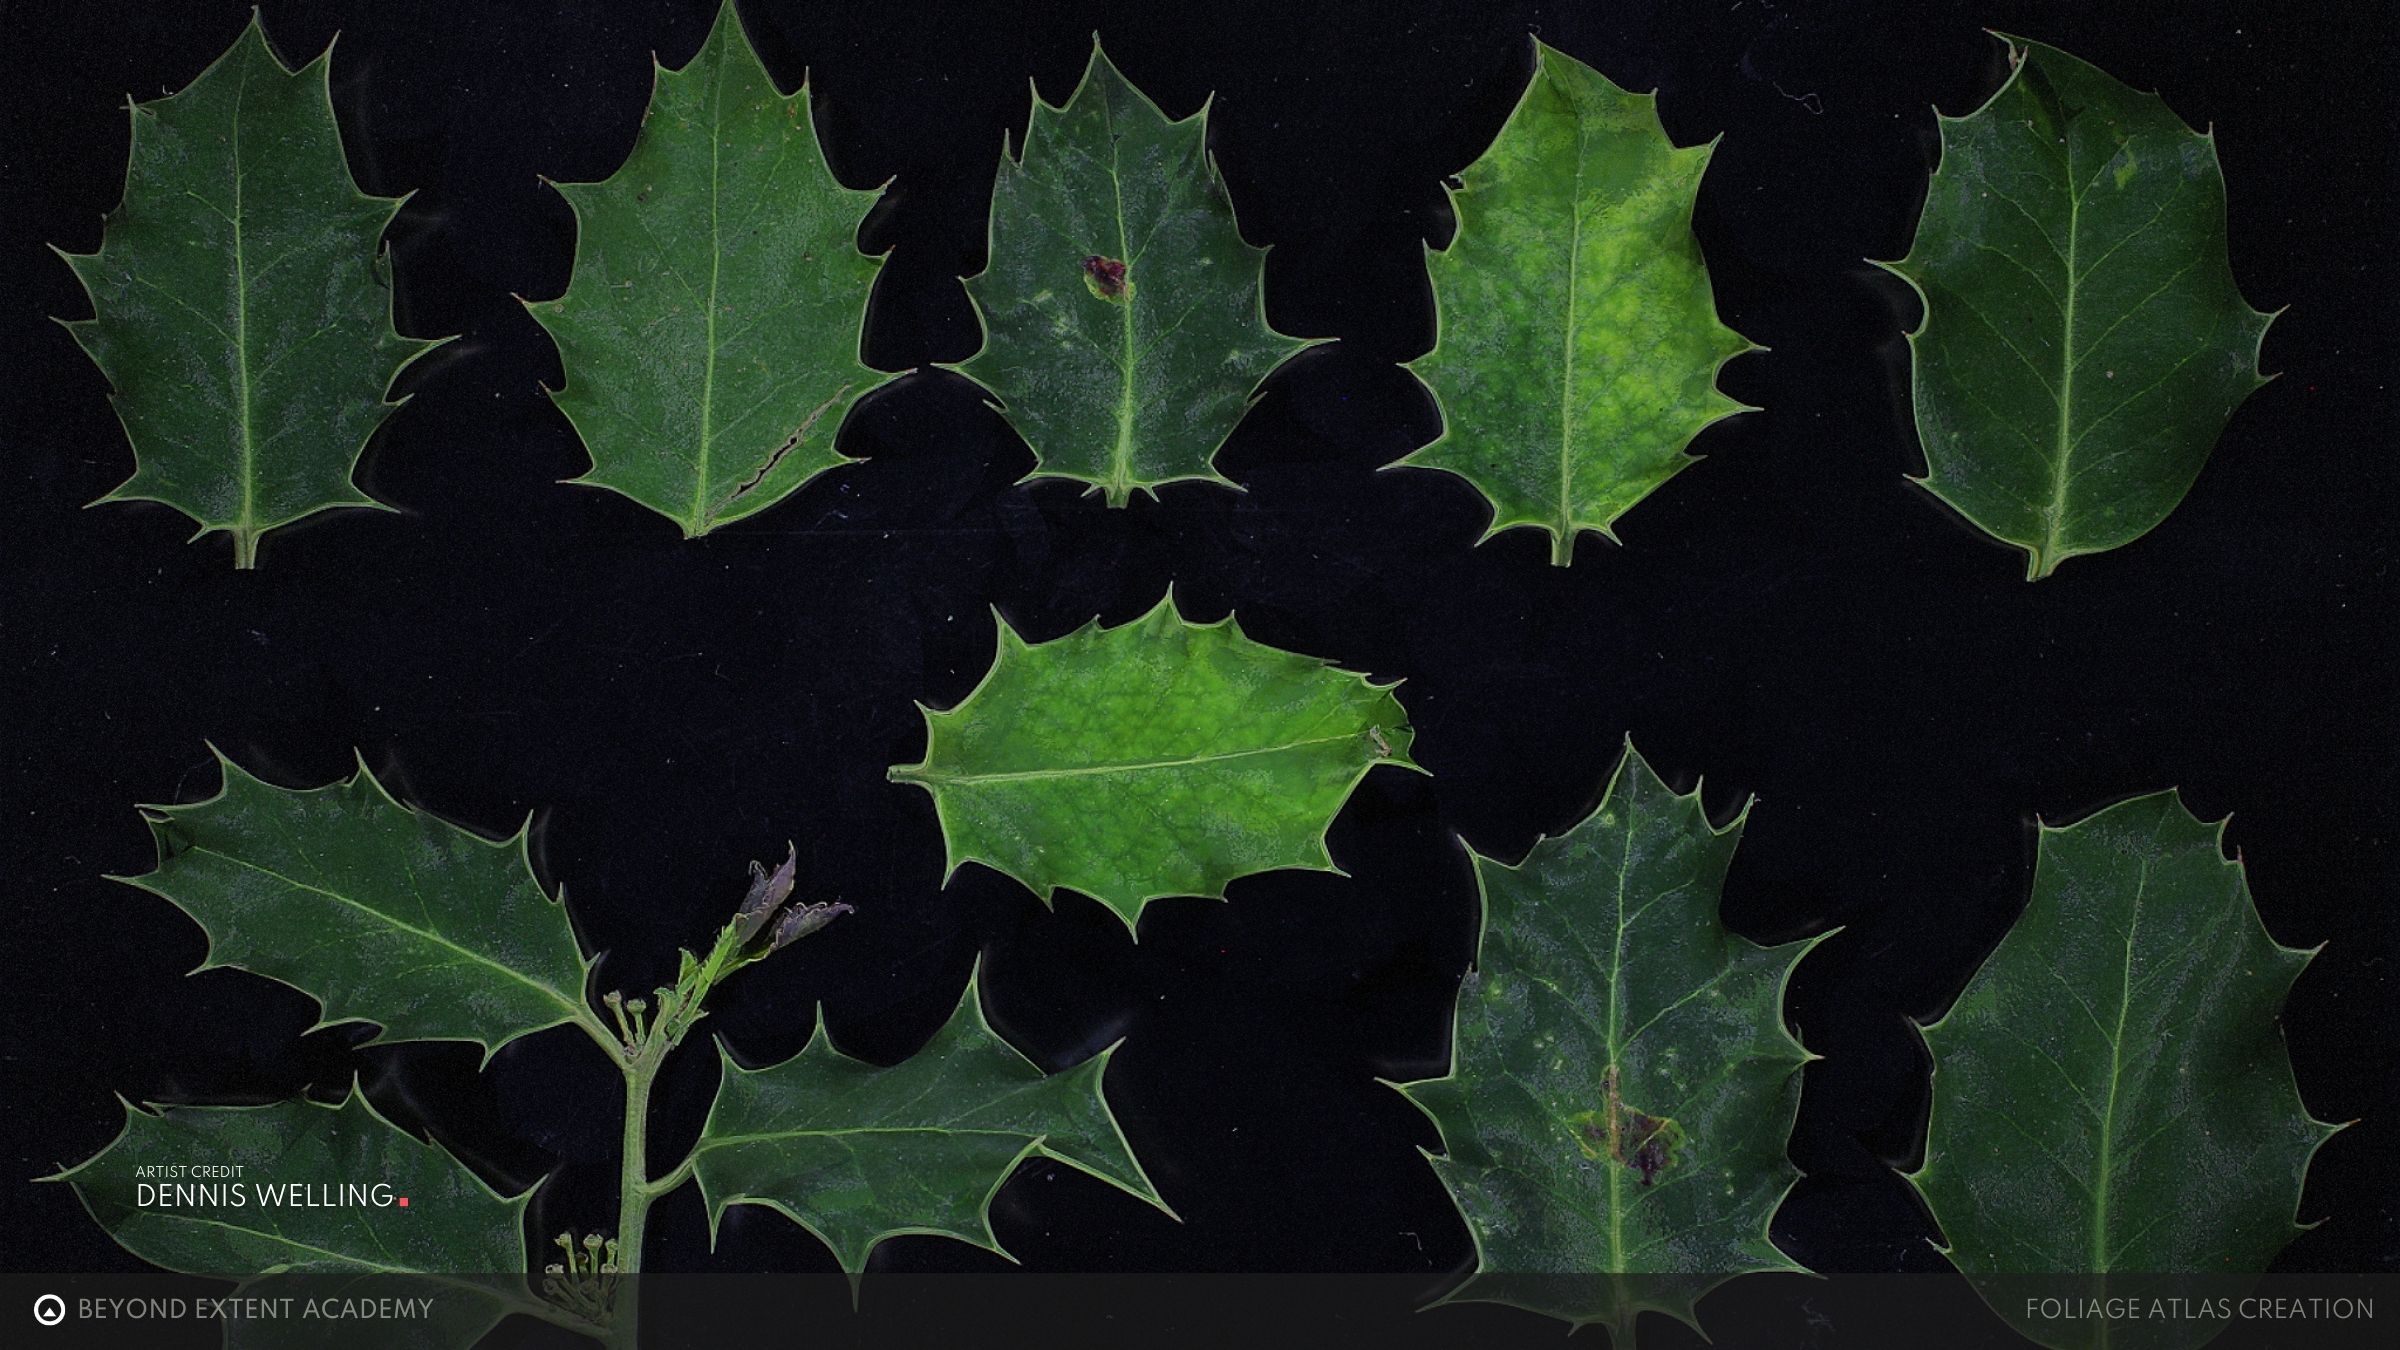
What is a leaf Atlas
A leaf atlas is a texture that contains all of our leaves in a single texture. We can then create geometry based on this texture that then used to attach to of any geometry, but in our case our branch geometry.
Let’s take a look at what a leaf atlas is and what to look out for when creating our own.
using photogrammetry in our process
There are multiple ways of creating these textures for ourself, usually you would create them in Substance Designer or even Sculpt them yourself.
But to skip to the actual part of the lesson that matters here we will be using an existing foliage atlas that I've scanned myself. For this lesson we will be used the following leaf atlas.
However, if you have your own set of textures you can also follow along with those.
If you want to find out how I normally create my own foliage atlas from scratch you can watch a full video on that in the RESOURCES section.
Or find more resources on how to do PHOTOGRAMMETRY yourself.
ADDING in fruits
Let us take a look at how to modify a scanned leaf atlas in Substance Designer and add any bits that are missing. In Blender, any missing parts, like fruits and berries can be modelled and unwrapped to the texture sheet.
Link to the mentioned video can be found in the RESOURCES section
exercise
Scanning your own leaves
⚠️
Missing EXERCISE IMAGE/VIDEO
goal
To continue we need to Create or Capture our own leaf atlas data which you can then use to create your own Foliage Atlas later on. For this exercise we will be making use of some quick captured data, leaning into accessible photogrammetry.
⚠️
MISSING DOWNLOADABLE CONTENT
process
1. Go outside on an overcast day with a black piece item as a base 2. Grab a couple leaves from a tree you want to create 3. Lay these leaves on the paper and photograph them straight down
foliage structural analysis
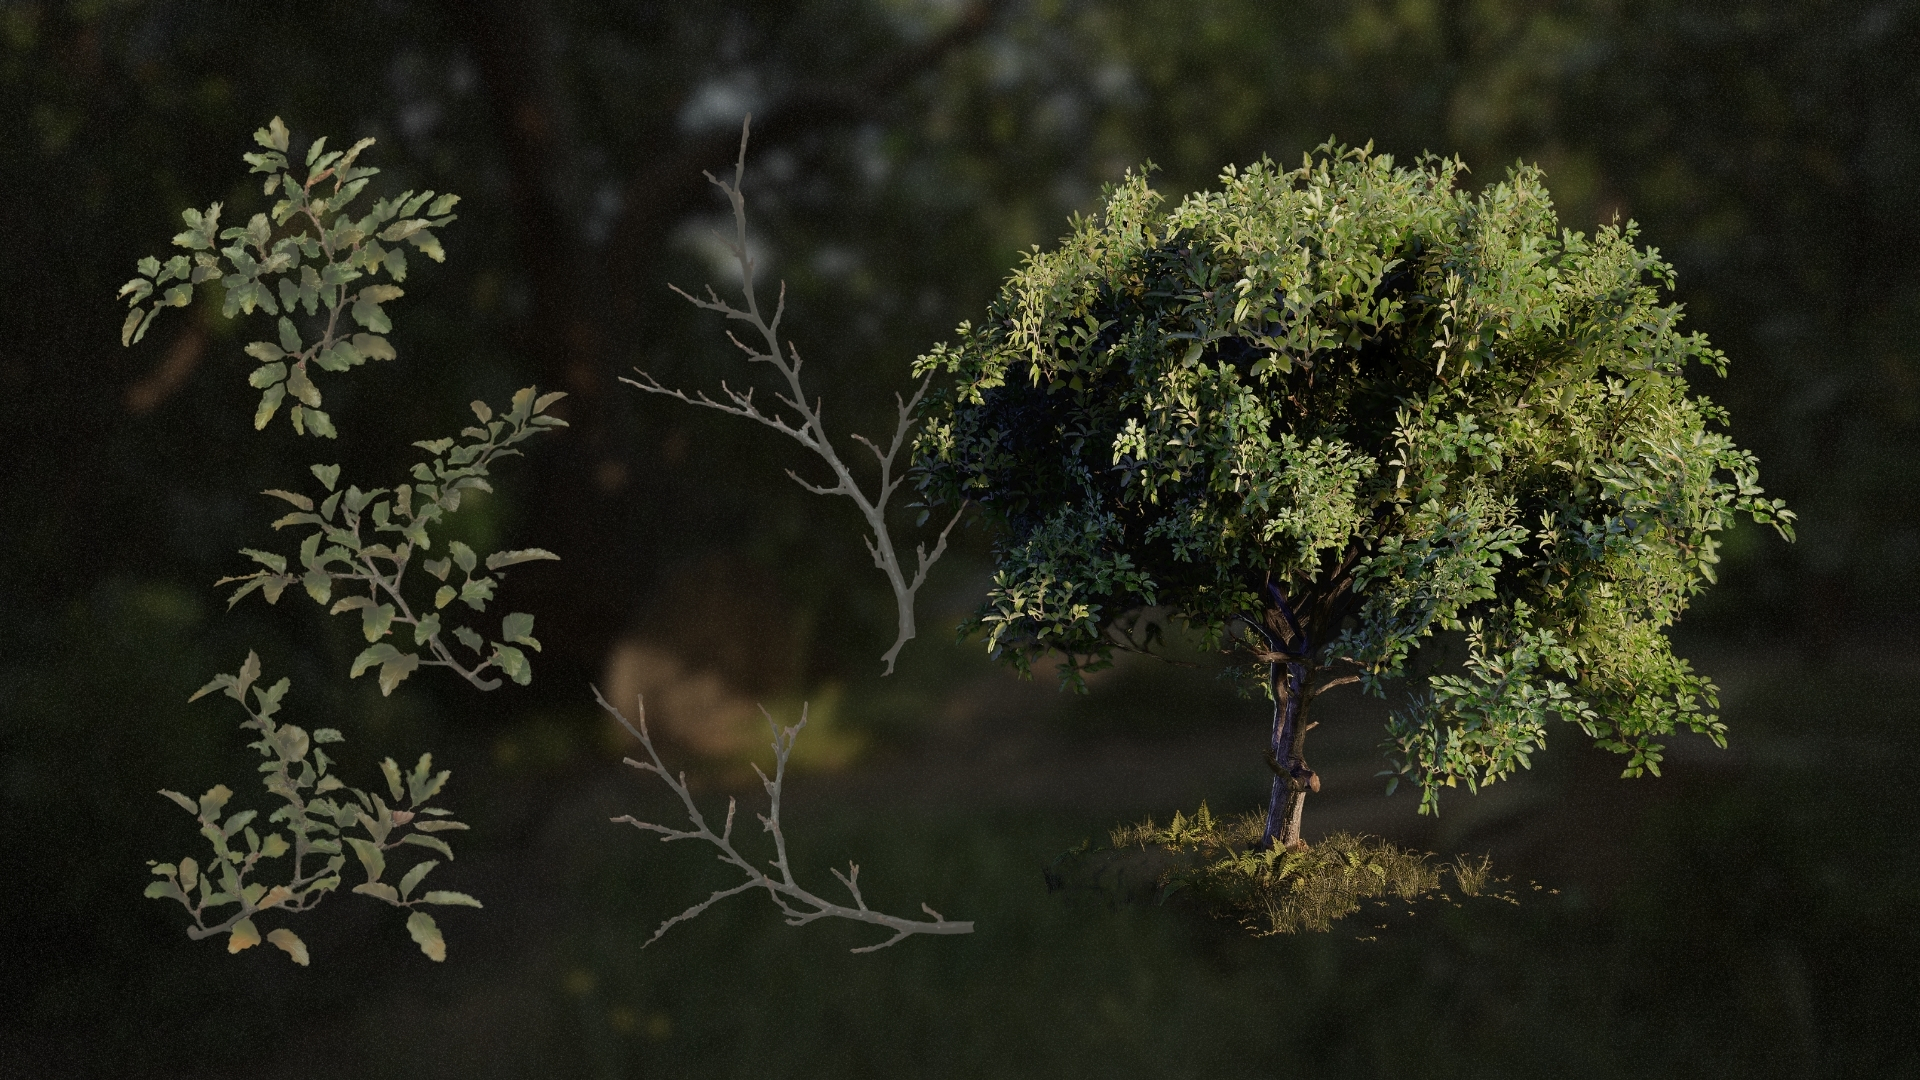
To understand what we need to create we need to grab a lot of references of the foliage we want to create. Additionally, it helps a lot if we draw on top of our reference images to make sure we fully understand the branch structure of the piece of foliage we are creating.
Understanding the plant structure is integral to be able to model it in the correct way.
More information on REFERENCE GATHERING
VIDEO EDITING NOTE:
- Switch up the visuals? Feels a little weird and low quality now
exercise
Desconstructing a piece of foliage
⚠️
Missing EXERCISE IMAGE/VIDEO

goal
Use a picture taken to deconstruct a piece of foliage into it's individual components.
⚠️
MISSING DOWNLOADABLE CONTENT
process
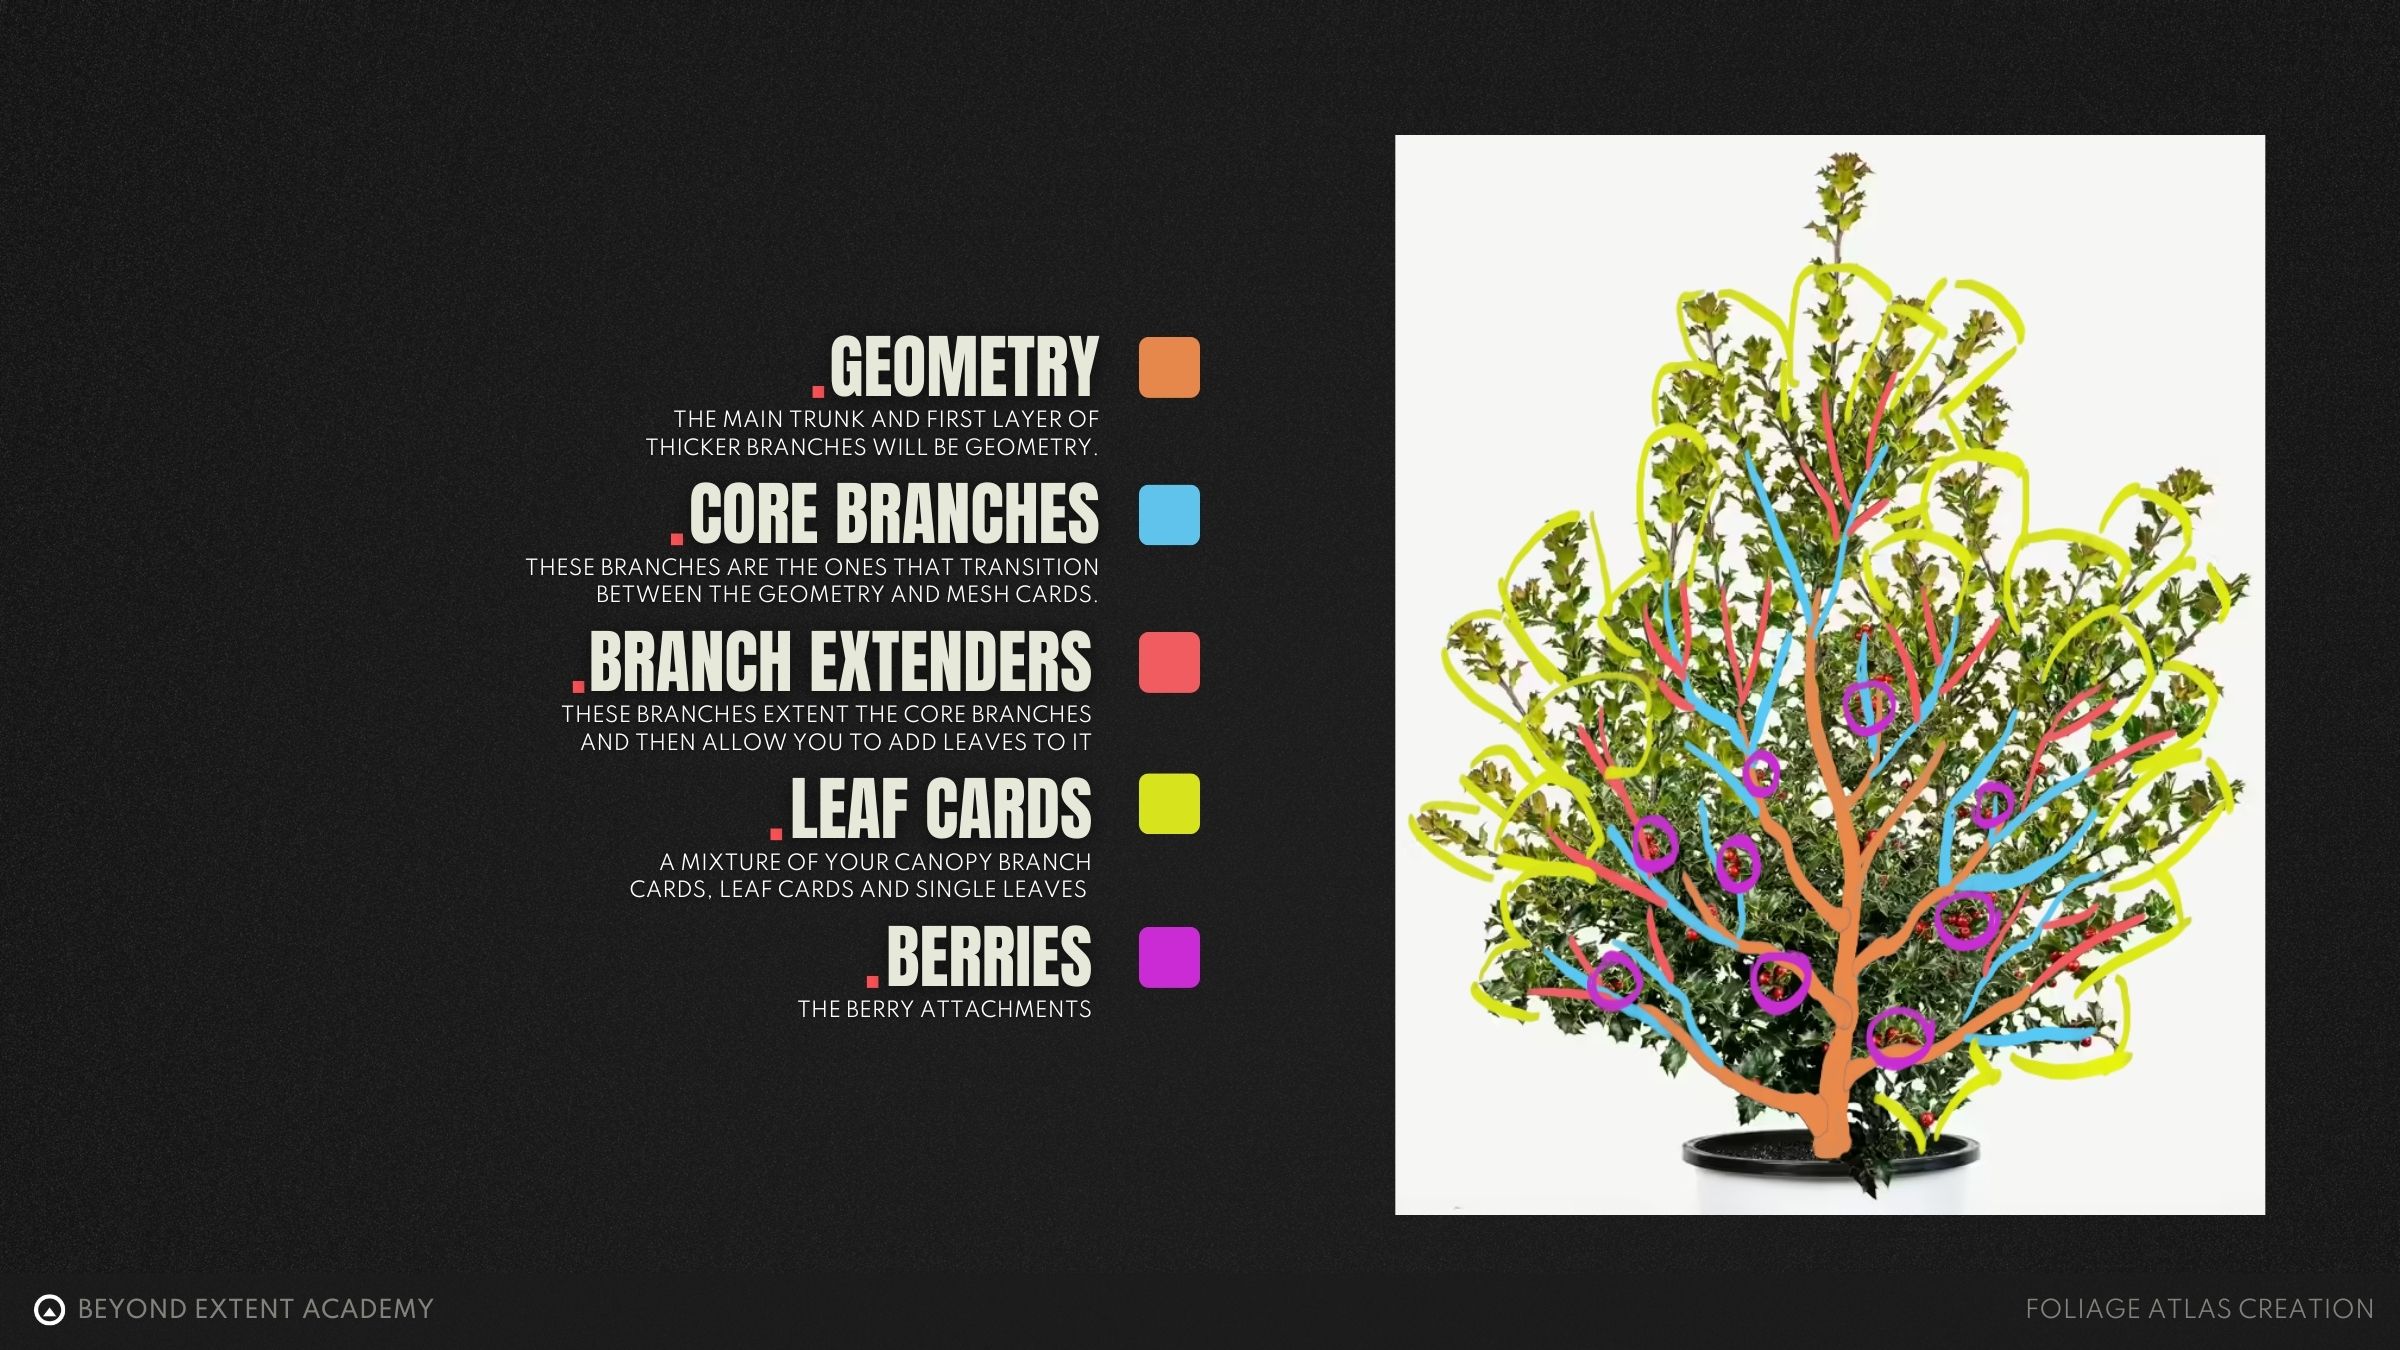
For this exercise we want you to take a picture of a piece of foliage and try and descrunstruct it into multiple layers. Try to distill the foliage into the following categories: Geometry (used from rtrunk and main branches) Branch Cards (used for inner layer of branches) Branch Extenders (Used for outer layer of branches) and finally your Leaf Cards (used for the canopy)
foliage atlas creation
Now that we understand the recipe for creating the holly bush fronds and branches, we can start with practically creating them. For that, we will be using SpeedTree to model the leaf cards and branches, which will later be baked into a 2D texture for the bush. Depending on your budget this step can be skipped.
In modern foliage for AAA game production, smaller plants at least use leaves and geometry branches directly. For our case, we will be using leaf cards still to work in a performant way and to understand the essence of creating performant foliage. Nonetheless, for the berries, we want to attach them as physical objects to the bush, so we do not include those in the texture.
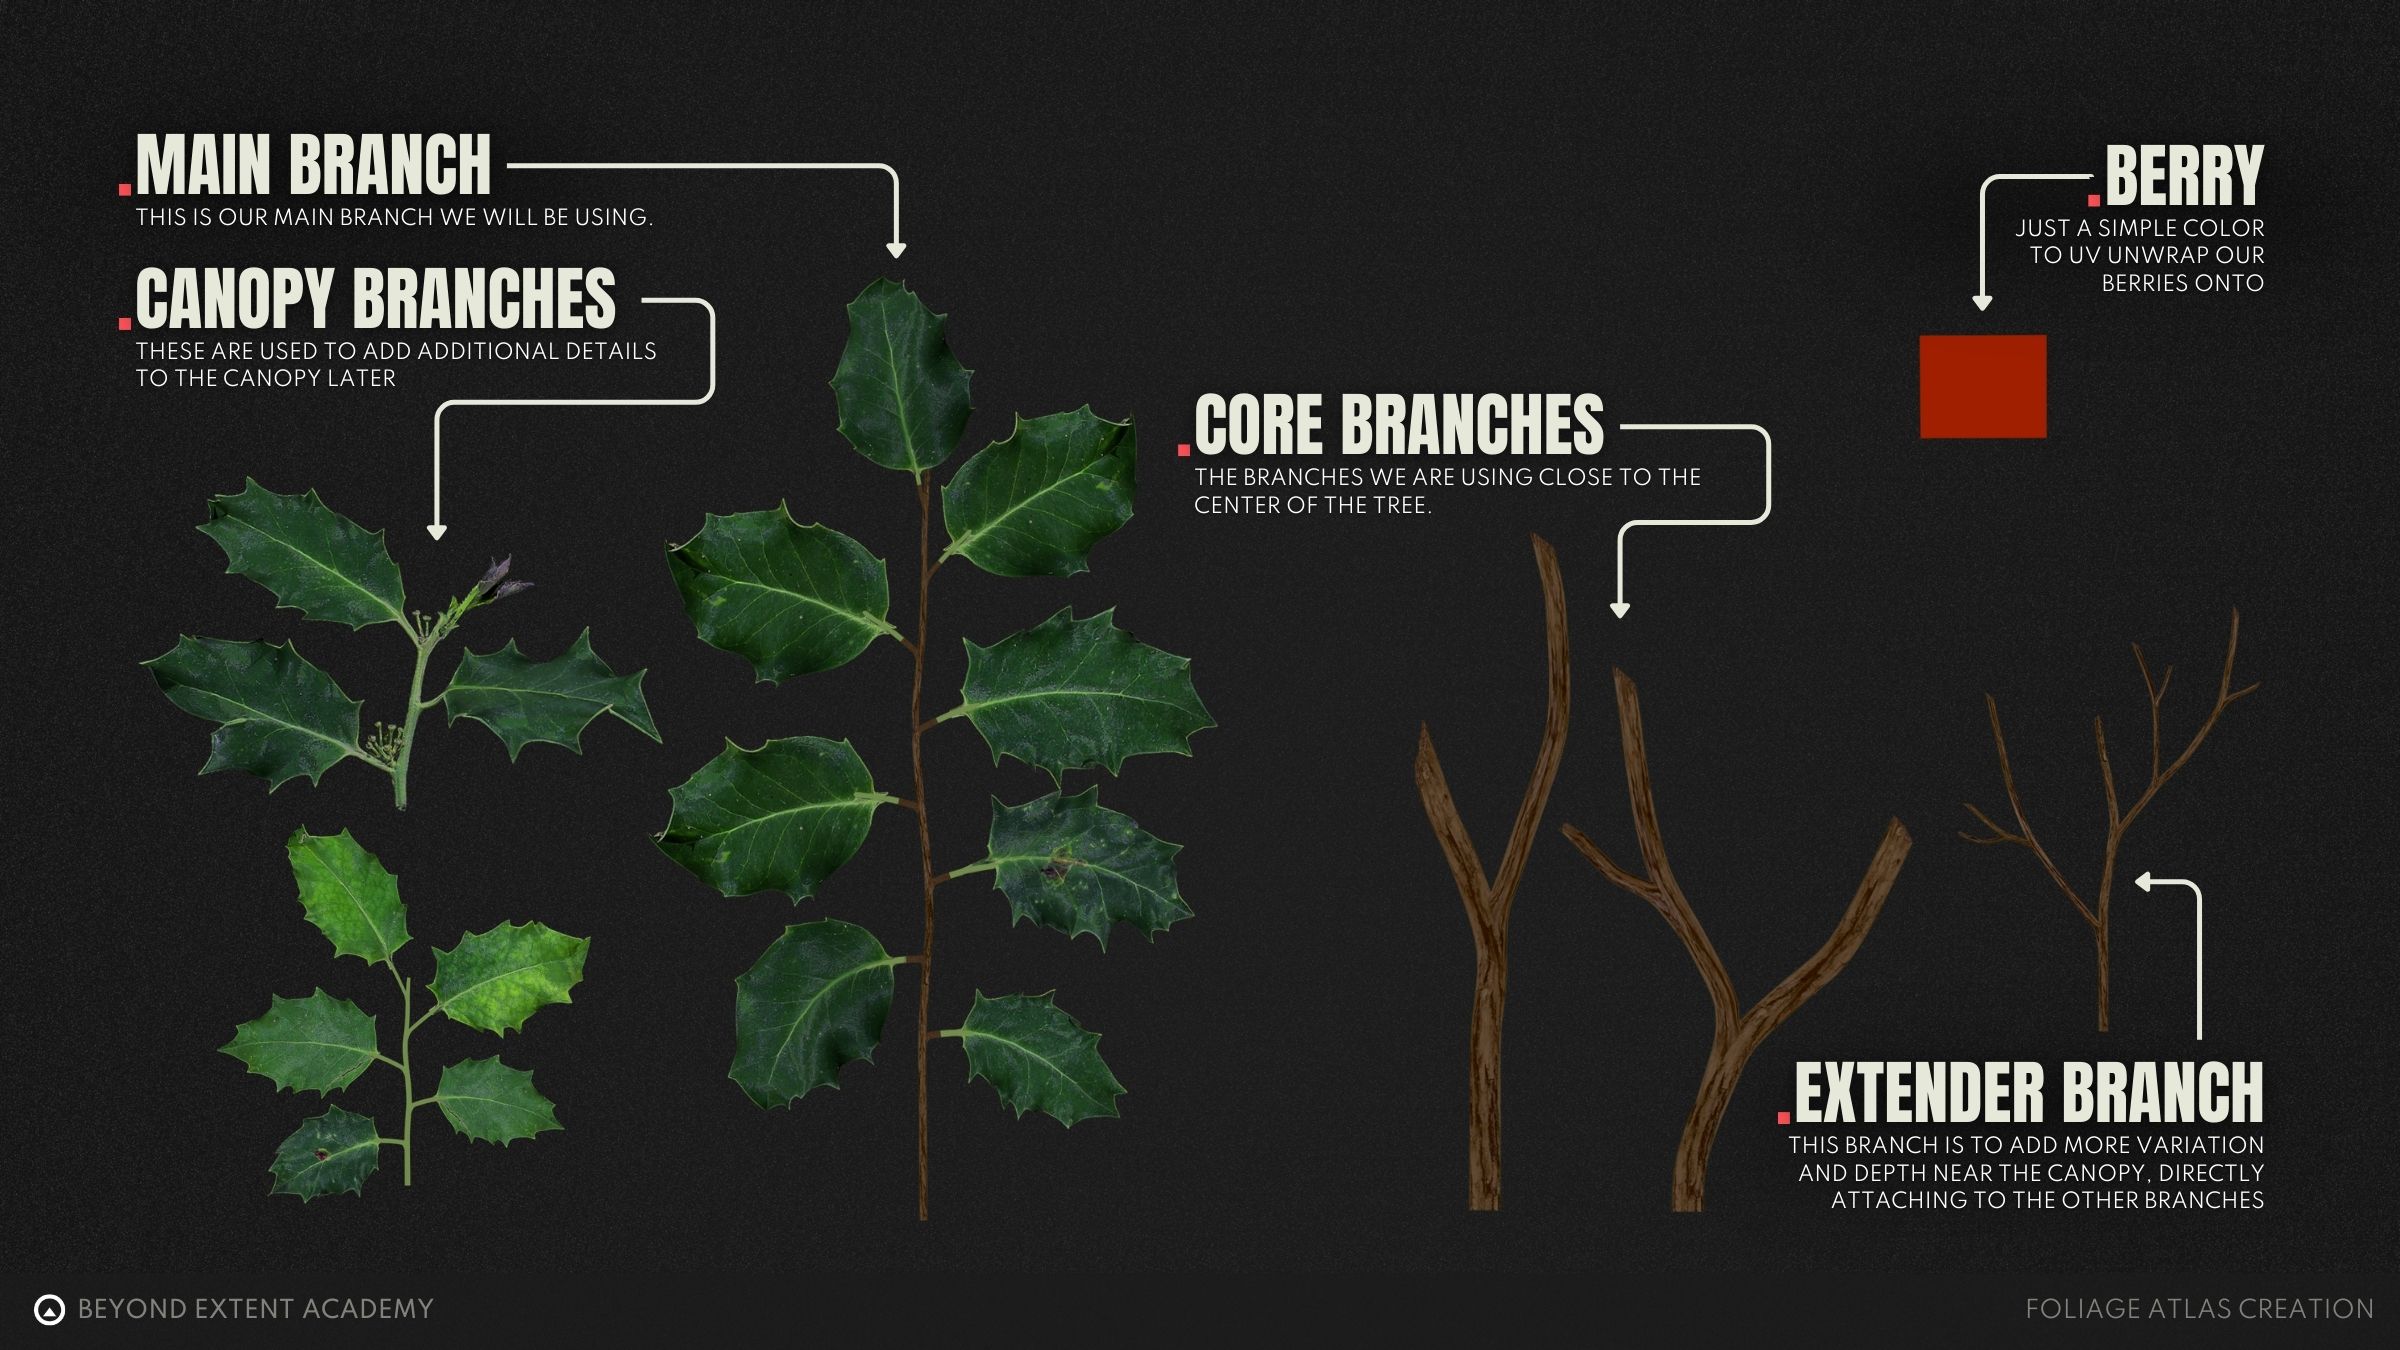
Creating Our Branches
First stop is creating our branch cards, these will be used as the secondary layer, after our geometry of our trunk and first layer of branches to then transition between the geometry level and the texture level. Making it as seamless as possible.
Creating Leaf Cards
Any piece of foliage will usually have some sort of greenery attached to it, so how do we go about creating that?
In a previous section we created a texture for our leaves, we can now start using this texture to help us create the leaf clusters. For that we need to go back to that texture really quick and make sure they are setup to be used in the next video.
Creating our leaf clusters
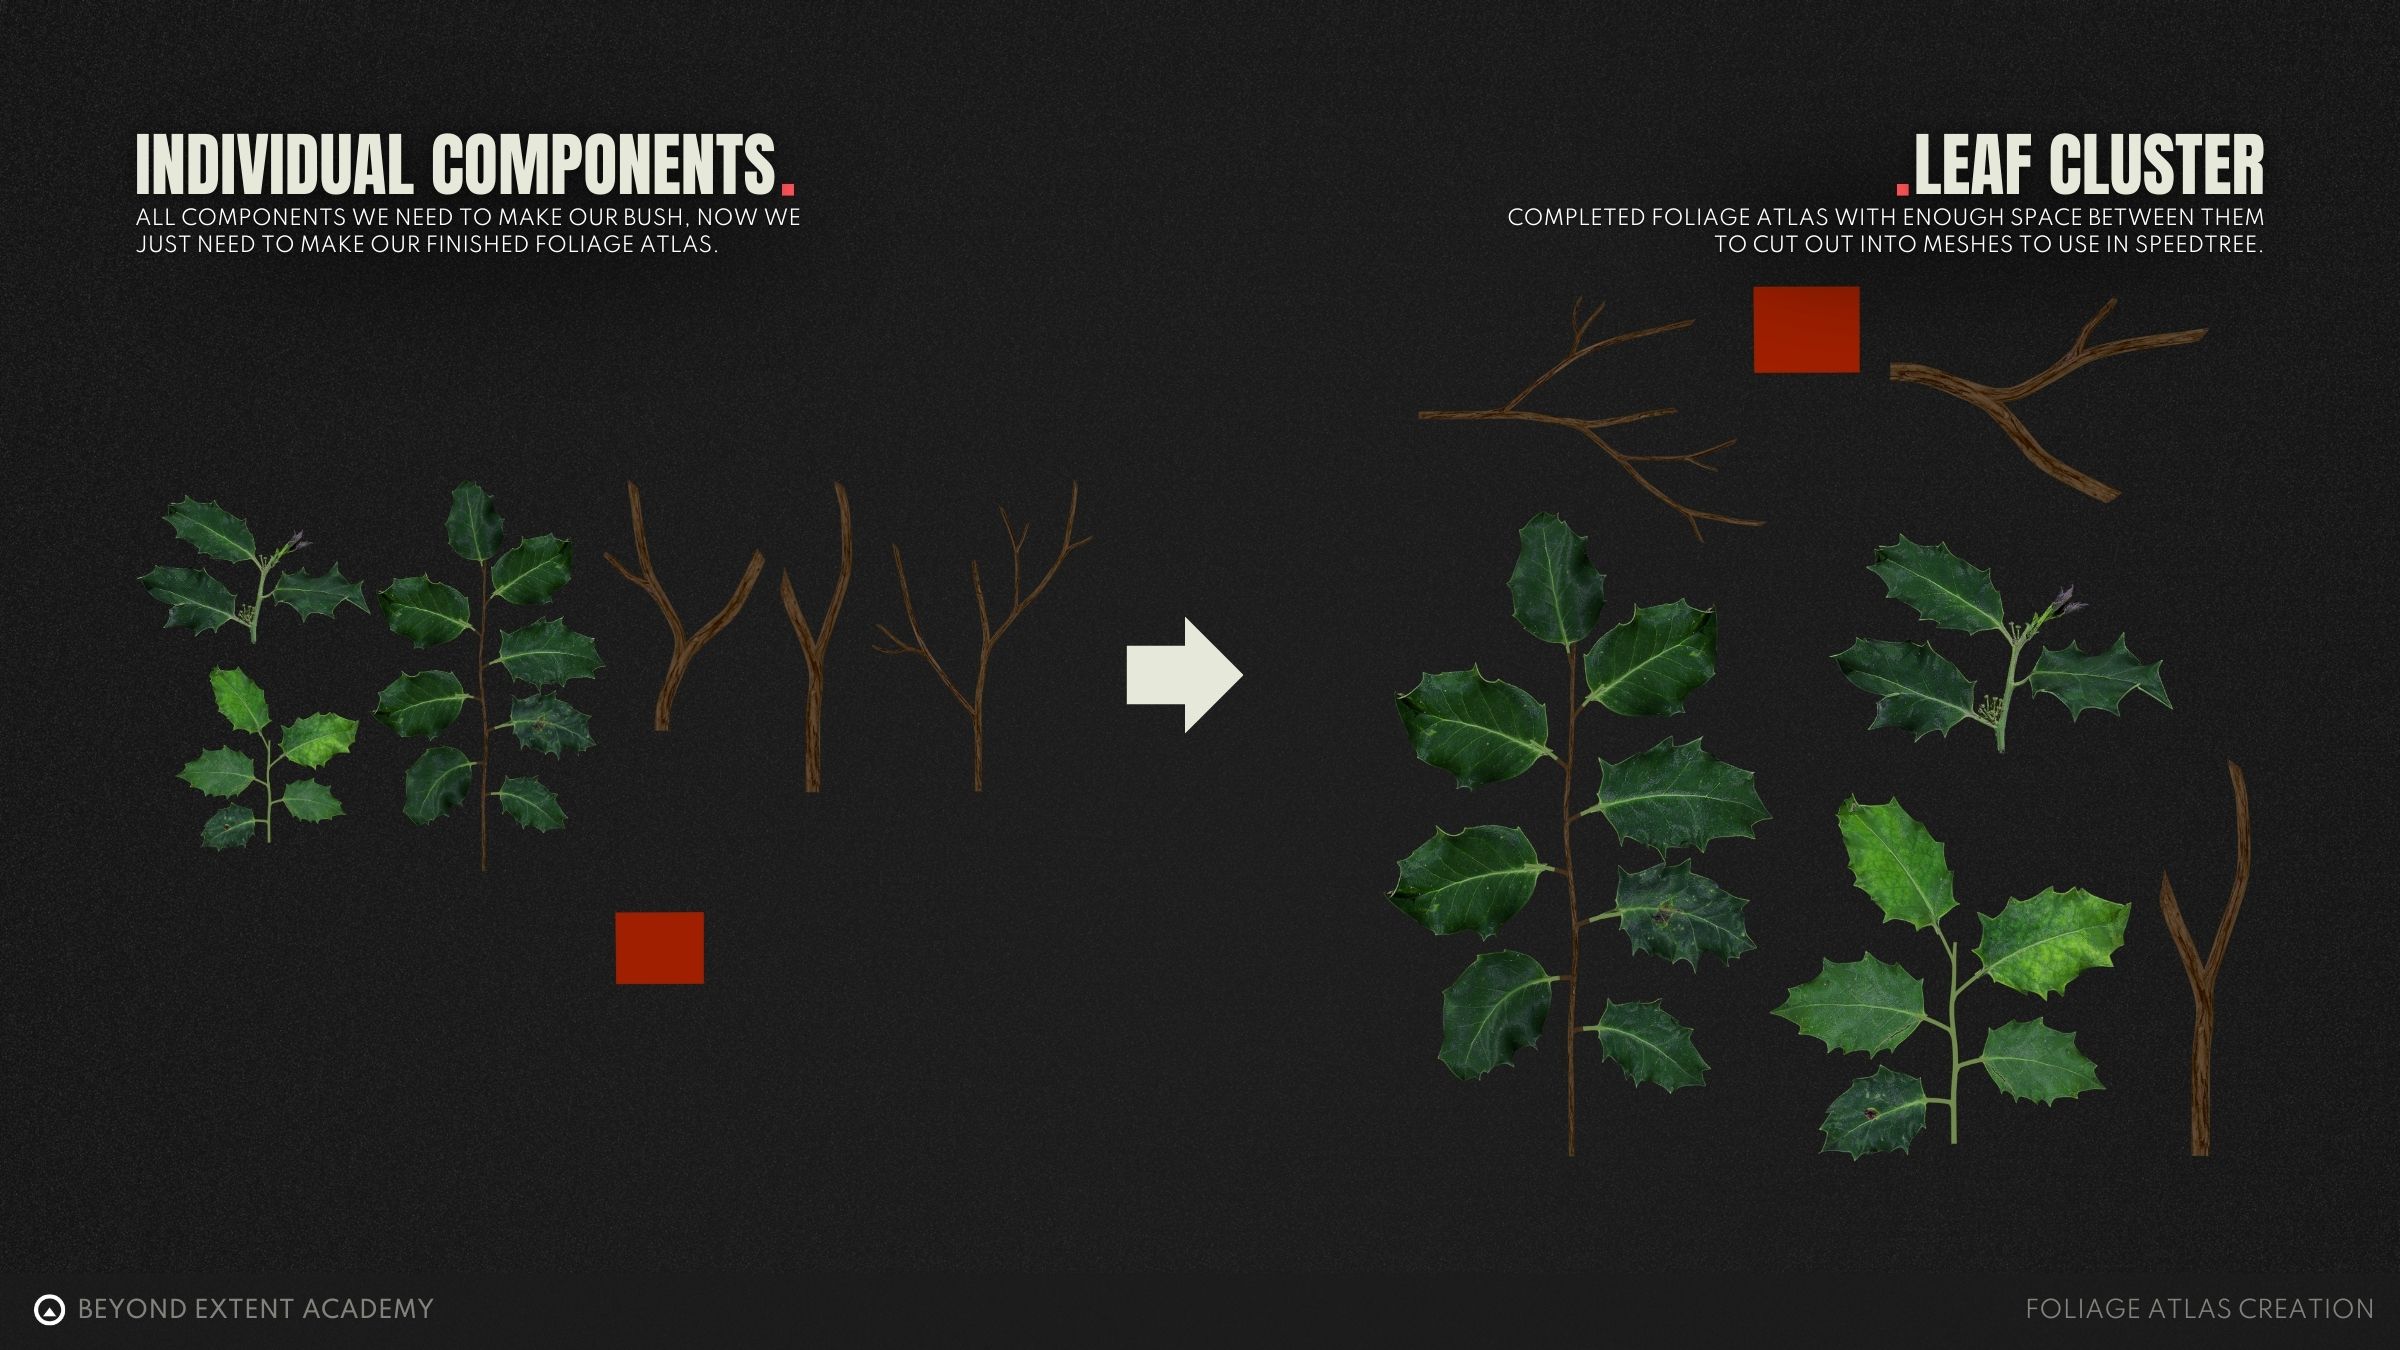
Using the now cut-out pieces of foliage we can now include them into our foliage atlas to use down the line. Combining these individual leaves and some geometry allows us to make our leaf fronds (branches with leaves that are just using flat textures).
Finishing Our Foliage Atlas
As we created all the individual components of our foliage atlas, it's time to assembled them all so we can bake them into our final foliage atlas.
Imaging that we are looking at a top-down view of your final UV. We can then move and rotate all these components into place on this UV allowing for a high Texel density leaving as low amount of unused UV space as possible.
This finished our foliage texture creation for our piece of foliage, we did this by analysing the plant structure distilling it to it's components and then turning those into a texture we can use.
We are going to be using this texture in the lesson on "Creating a holly bush", However, the principles remain the same wether you want to create grass, a bush or a tree, they all require the creation of a foliage atlas.
exercise
Create your own foliage atlas
⚠️
Missing EXERCISE IMAGE/VIDEO
goal
Using the previous exercise results where we captured our own leaf data we will now use this to create our own foliage atlas out of this.
⚠️
MISSING DOWNLOADABLE CONTENT
process
1. Grab your previous leaf scans. 2. Make your own cutouts and components 3. Compile these components into your final foliage atlas
RESOURCES
⚠️
MISSING RESOURCES