


get the pdf version
TAKE THIS RESOURCE ON THE ROAD WITH YOU
LESSON OVERVIEW
what is a trimsheet?
Trim sheets are textures which tile in the Horizontal (U) or Vertical (V) direction. They are used to quickly add detail to an asset with otherwise simple geometry as they generally consist of multiple trim elements which can be UV mapped onto an asset to add the illusion of a higher level of detail which is not present on the model.
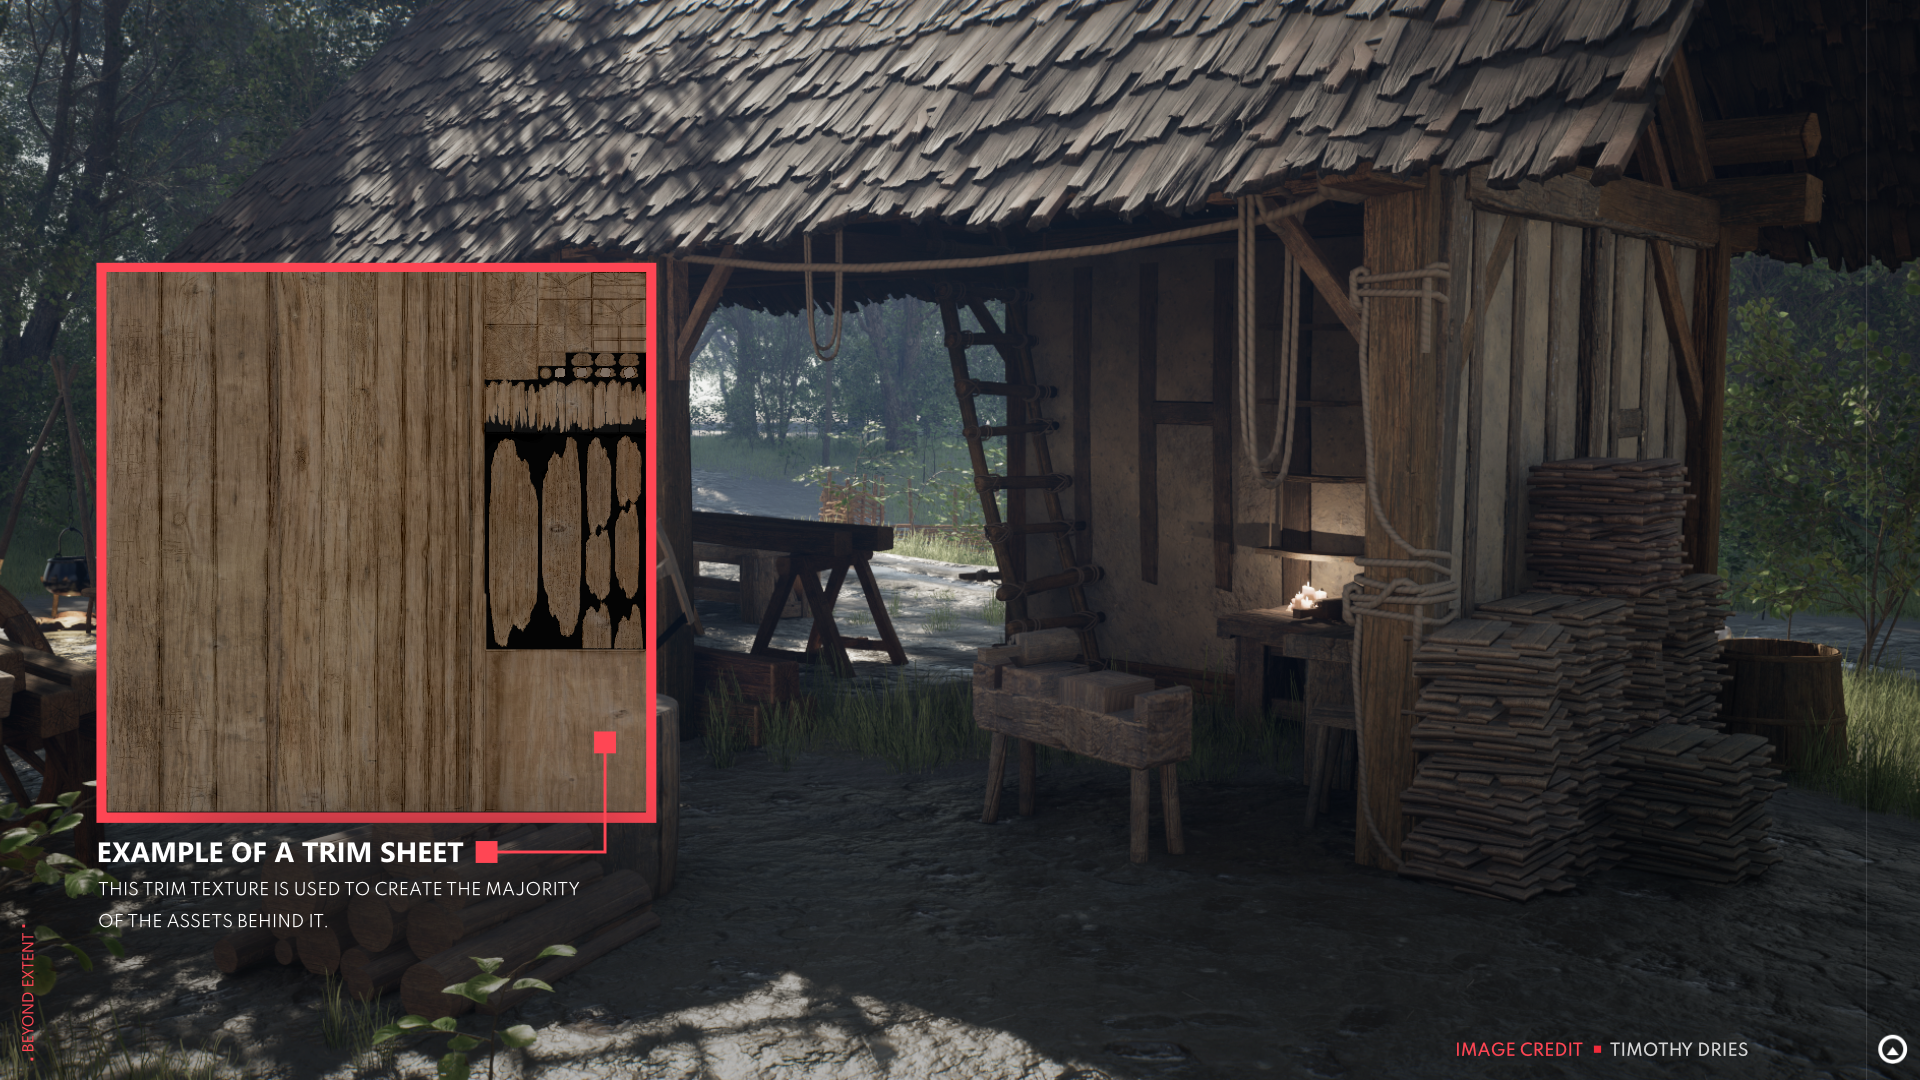
Although terminology can become quite vague when you have trim sheets with elements which aren't meant tile such as panelling. This trim can be used across multiple assets and can be arranged in many different layouts to accommodate the needs of the current project.
Why would you use a Trim Sheet?
The main thing which make trim sheets valuable is their reusability. If you have a scene with lots of recurring elements those are ideal candidates for a trim sheet.
Trims are a great way to quickly add detail to your model without additional modelling and extra geometry. Some other benefits of the Trim-Sheet workflow are the textures can be used across a project to texture and detail many assets consistently and quickly, This can be a good way to ensure assets across a team stay consistent in quality.
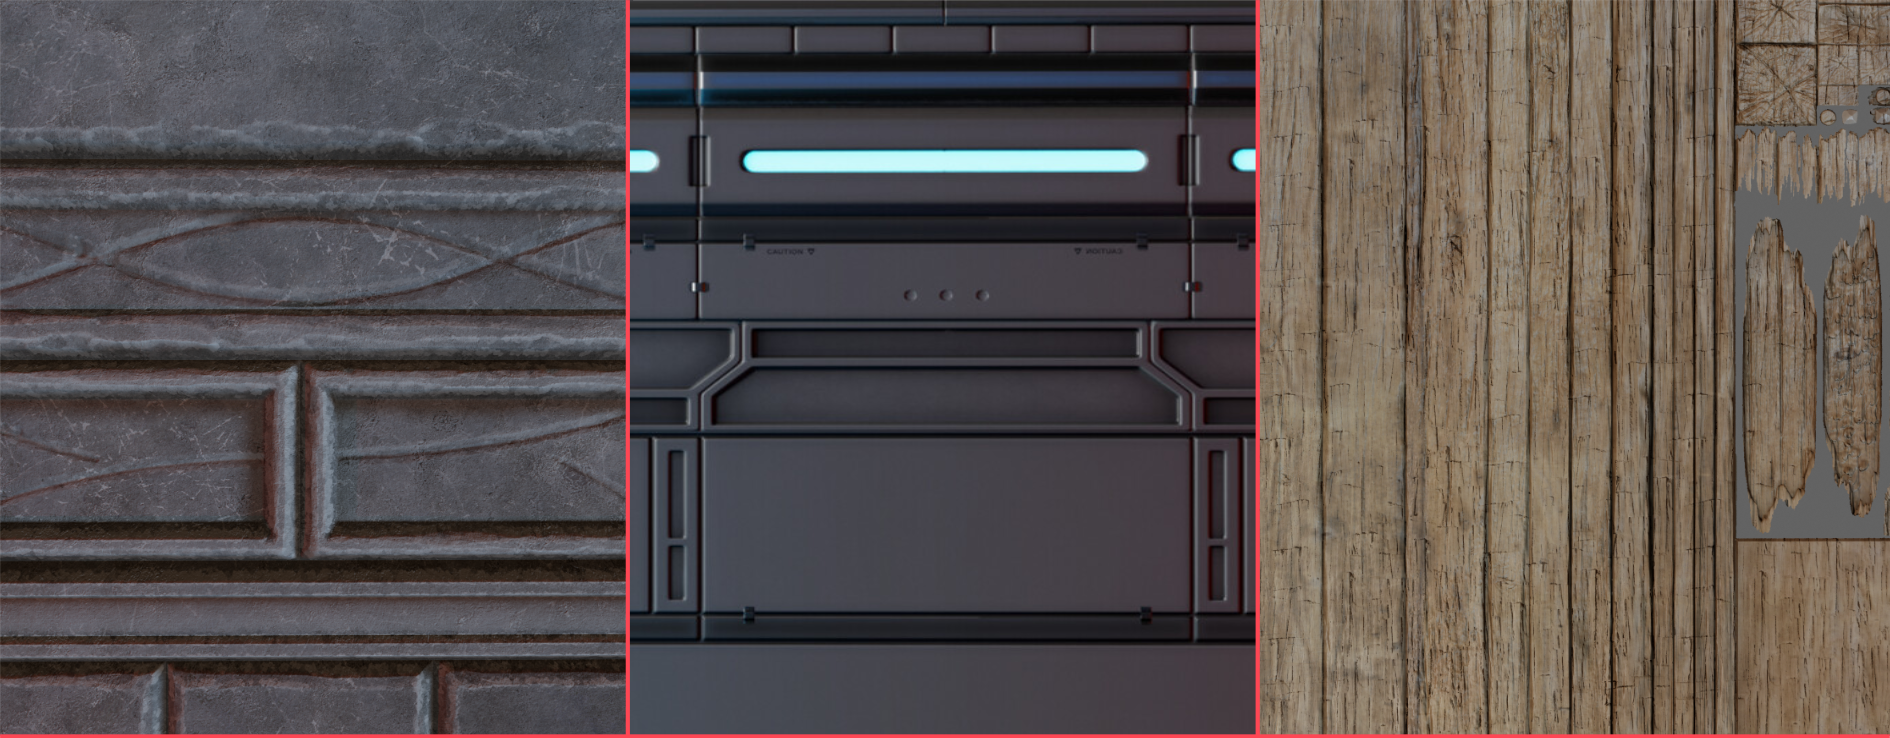
It can be really surprising how diverse of assets you can texture using the same trim sheet, such as the previous image where a large section of the scenes assets are made using one trim sheet, excluding a few tiling materials. This can be made even more reusable by techniques such as adding a paint layer onto the wood through the in-engine shader graph.
What makes them different to other textures?
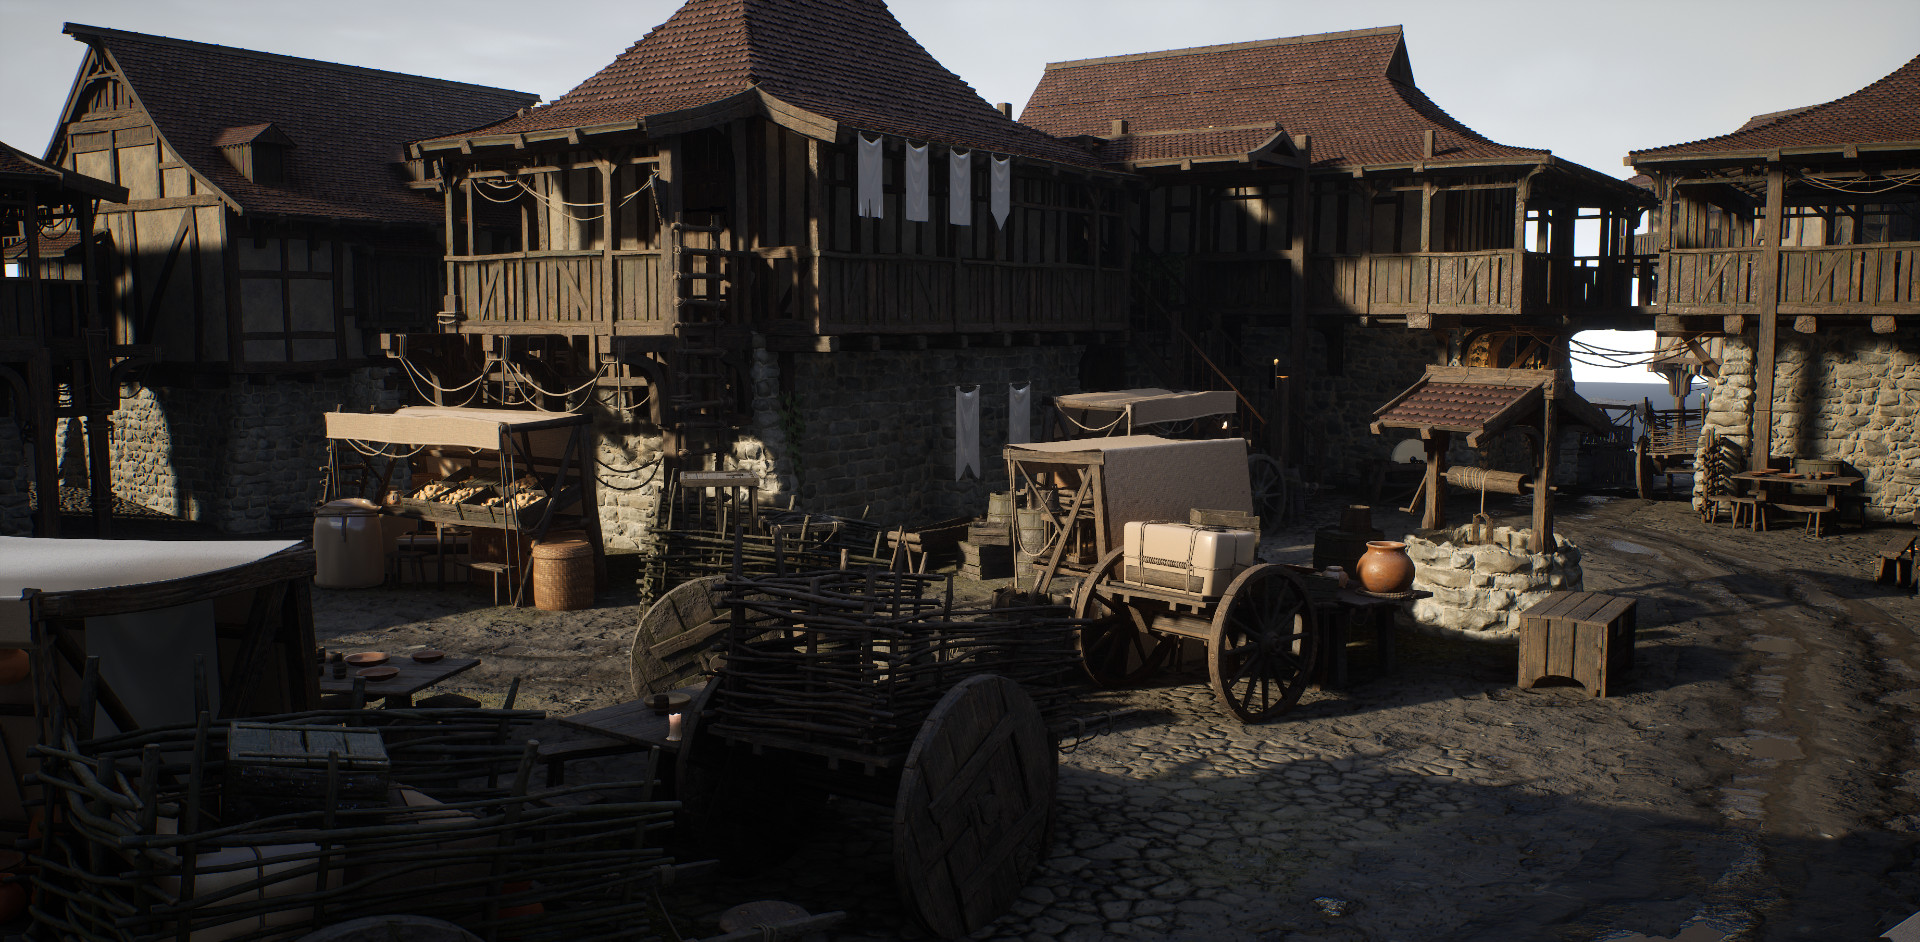
One of the main differences with trim sheets are that your assets uv’s are likely to overlap and extend further than the 0-1 UV space using a trim-sheet workflow, this is because the texture is tiling in either the U or V direction meaning your texture is perfectly fine if it exceeds the UV bounds in the tiling direction.
This differs from a standard UV layout where none of your UV shells generally overlap or are placed outside the 0-1 UV square due to workflow requirements.
A small downside of the trim-sheet workflow is that due to their high reusability and tiling nature they generally lack any obvious unique elements which would stand out if the texture was tiled or reused throughout the scene.
This doesn’t mean its not possible to have nice unique elements on your trim assets but these details wouldn't be added through the trim itself but through methods such as mesh decals.
planning a trimsheet
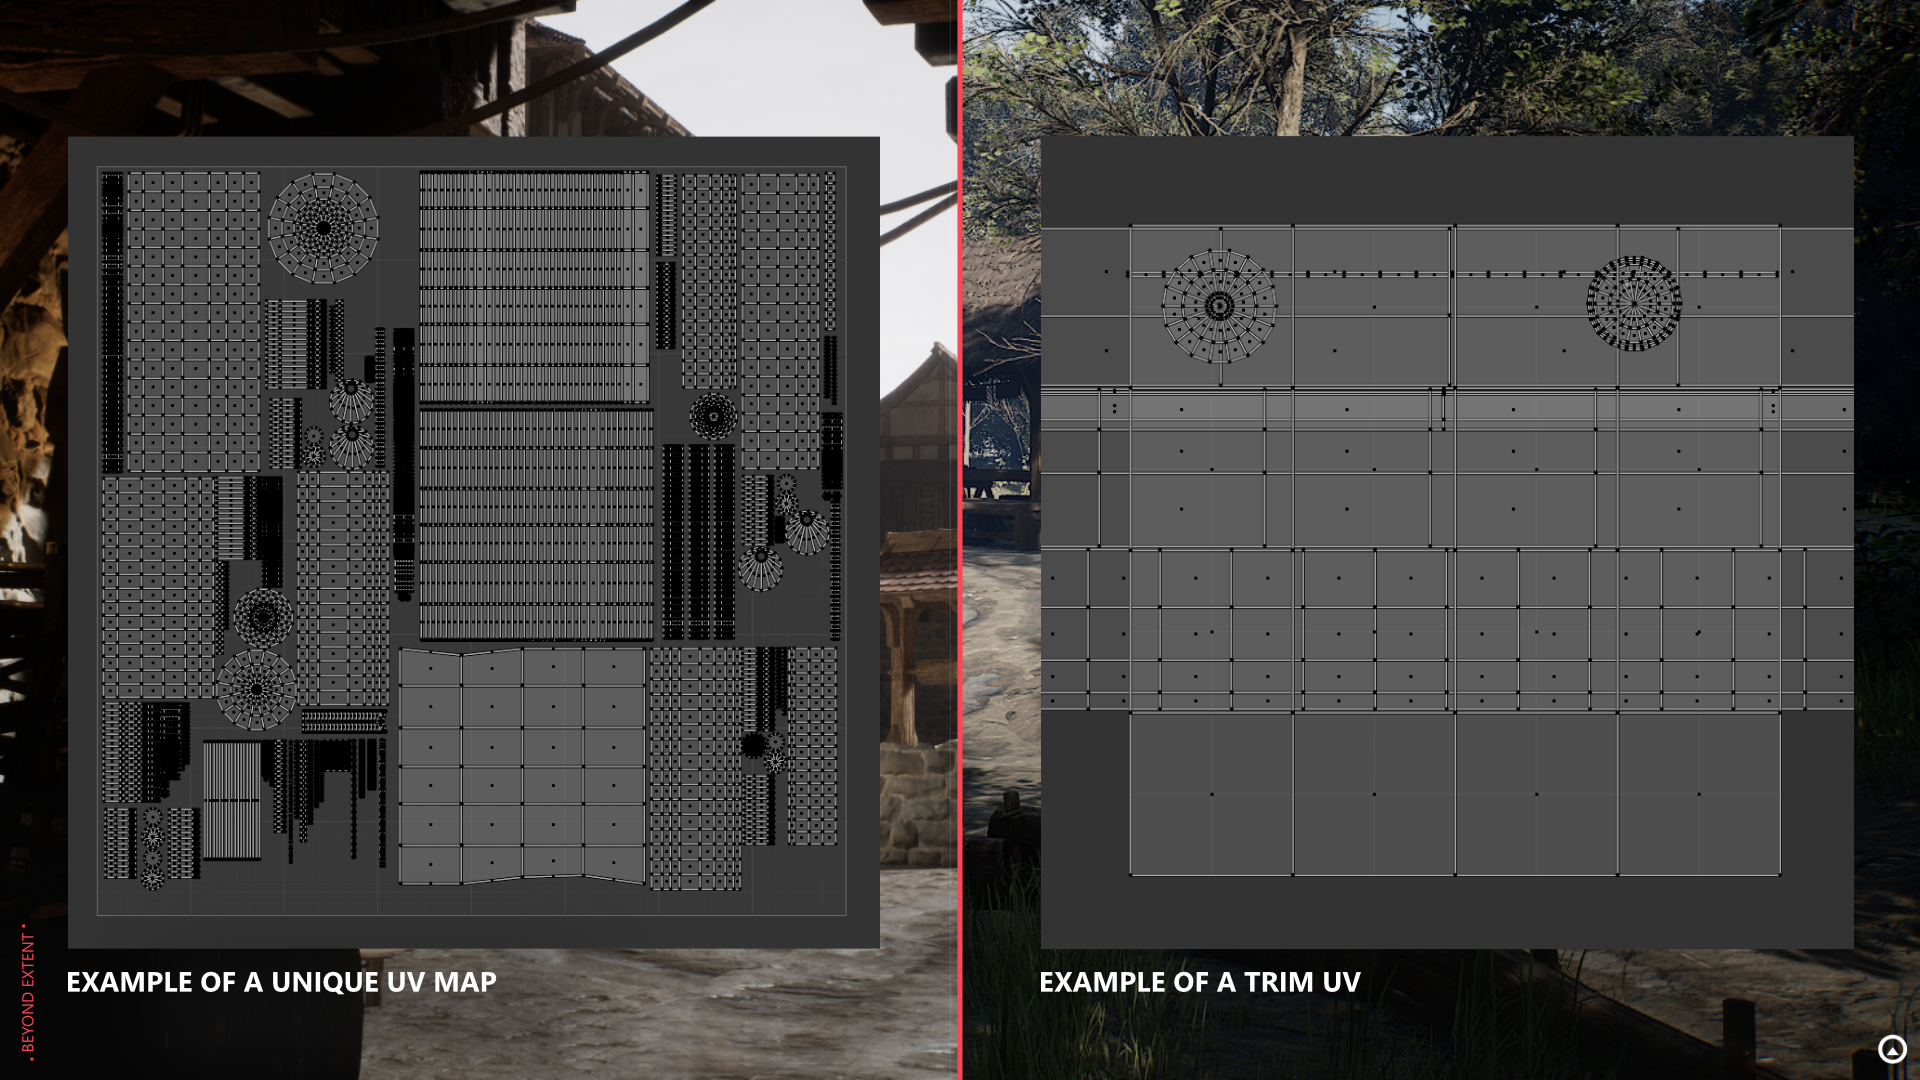
A good way to approach planning your trim sections is in a 2D format. Either as a quick sketch or if you find it easier you can just block out the sections in 3D.
Either way a good place to start is with a 3D plane or a square canvas. From this point onward we need to decide if you want the trim sheet to tile in the vertical (V) or horizontal (U) direction. (This doesn't matter that much, just choose whatever feels most appropriate for your desired trim sheet.)
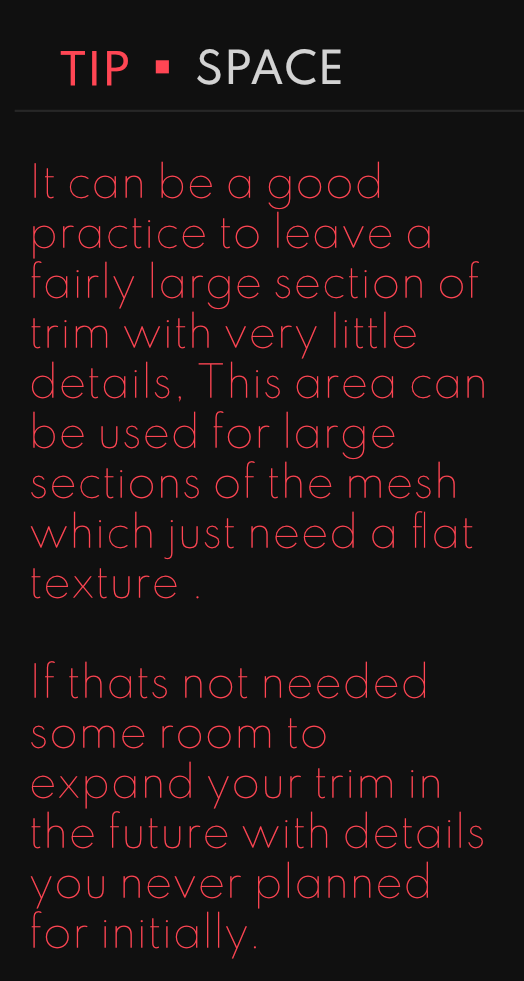
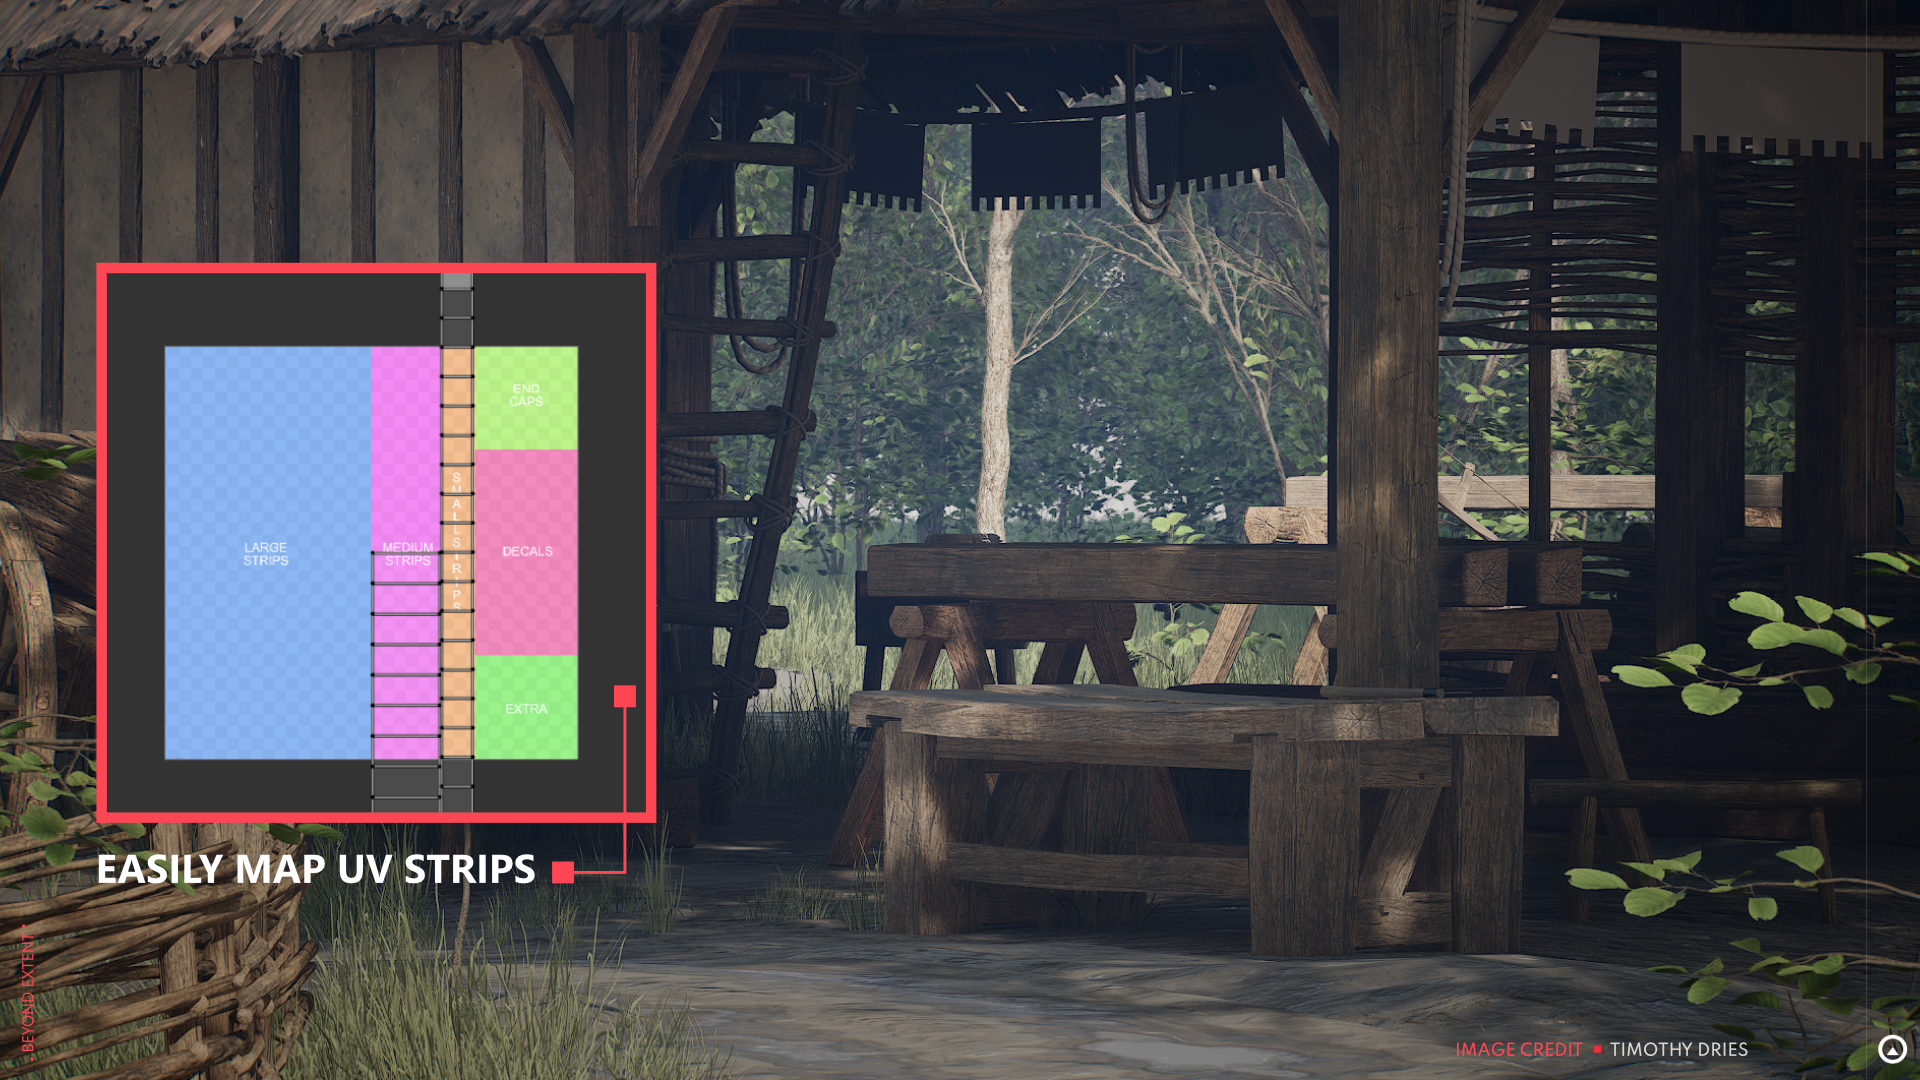
Once you’ve created your square, start to split it up into sections/strips which you think would suit your environment. Before you start, consider the largest element of your scene the trim sheet will be needed to texture. As an example if you have a thick wooden beam which is 50cm wide in your desired scene you will need to add a space on your trim sheet to accommodate for that. In general your trim elements should be proportional to each other at the very least, this means your elements will at least be consistent with each other in detail.
If you create your trim sheet in sections with consistent sizes and proportions you can more easily switch out sections and plan them out easier. This also makes it much easier to create trim sheet variants which share the same layout and allows you to switch out trim materials and turn a wooden shed into a metal shed if you had two different trim texture sets/palletes.
If you want to be more technically correct your trim sheet should still try to follow a Texel density goal. This is a topic in its own and will be covered in its own deep dive.
Standard creation methods
We need to create the 3D form of our trim if you haven't already blocked it out in the planning phase and bake that mesh down onto a plane.
It doesn't matter how you create the high poly for the trim sheet, either by traditionally modelling the high-poly in your favourite modelling package, or doing an additional pass in a sculpting package like ZBrush to add some more edge wear and damage.
Baking your Trim-sheet down
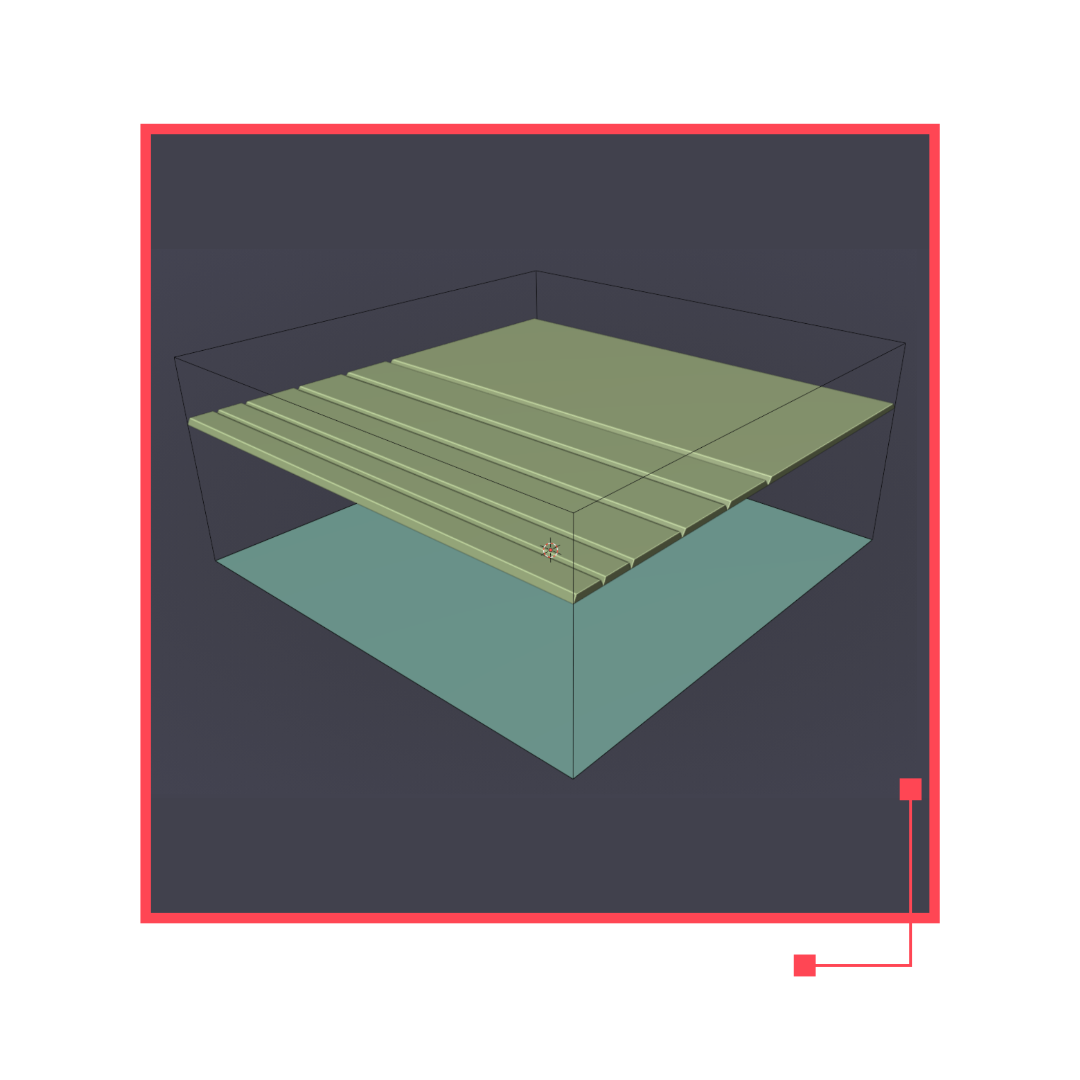
It looks more complicated than it is to get started with baking, you just have to have the “high poly” version of your trim laid out above a simple plane. Ensure the UV’s are assigned perfectly to the 0-1 UV space to ensure proper tiling. Remember orient the plane UV’s upright otherwise your going to have a 180° or 90° rotation on your trim.
The First thing we need to keep in mind, we need to make sure that our baking distance or cage is large enough, so in this case our is a plane above our low-poly which will capture all the information in between the low poly plane and the furthest reaches of the bake distance.
Some programs will give you a visual representation of your baking distance and others will give a numerical value, either way just try some different values and see what provides you with a good result!
Other than the details above, the baking process follows an almost identical process to uniquely baked assets. If you are not familiar with uniquely baked assets it is recommended that you become familiar with that process before attempting to create a trim sheet.
Once the high poly texture maps are baked down to the plane, such as normal, AO and curvature you can use the same plane in substance painter and start texturing the trim sheet.
UV’s to maximise your trim sheet!
Once your ready to texture your asset, mark some UV seams you think would create good sections to map to the trim sheet. Long rectangular sections work well as the tiling on the trim is perfect for that just make sure when you unwrap your object to straighten out any UV shells. It will make it a lot easier to line up to the trim sheet and is generally good practice to assist in UV packing generally.
Another use case you might have added to your trim-sheet is panelling. This could be any square or rectangular element which could be mapped directly to a corresponding area of the mesh. An example could be a sci-fi keypad you could use around a scene, this element wouldn't need to tile so you would just map it directly to the faces you would like the element to appear on around the scene. Creating areas of non-tiling panelling. and other unique elements is the start of creating a hybrid trim sheet. This is covered later in this deep dive, but just to note as soon as you start adding more unique non-tiling sections of your trim it may be considered more as an hybrid trimsheets or atlas by others.
swapping trimsheets
If you have created two separate trim sheets with an identical layout, where each trim element shares a similar size and/or use case. you can easily swap out a trim sheet which is a sci-fi metal spaceship trim-sheet with another which has lots of sculpted wood. In theory if both trims share a layout and functionality you would be able to switch materials or even trim geometry and have two vastly different appearances on the same set of objects without changing any UV layout.
A recommended method of creating a layout which is easily replicatable is using consistent snapping distances. E.g. If the texture your creating is 1024x1024 pixels squared. It would be beneficial to create strips with consistent pixel heights such as 512, 256, 128, 64, 32, 16. This way you can easily create the exact same layout over and over again with little trouble. Another benefit to this method is you can easily replace or switch around 256 tall strips with each other.

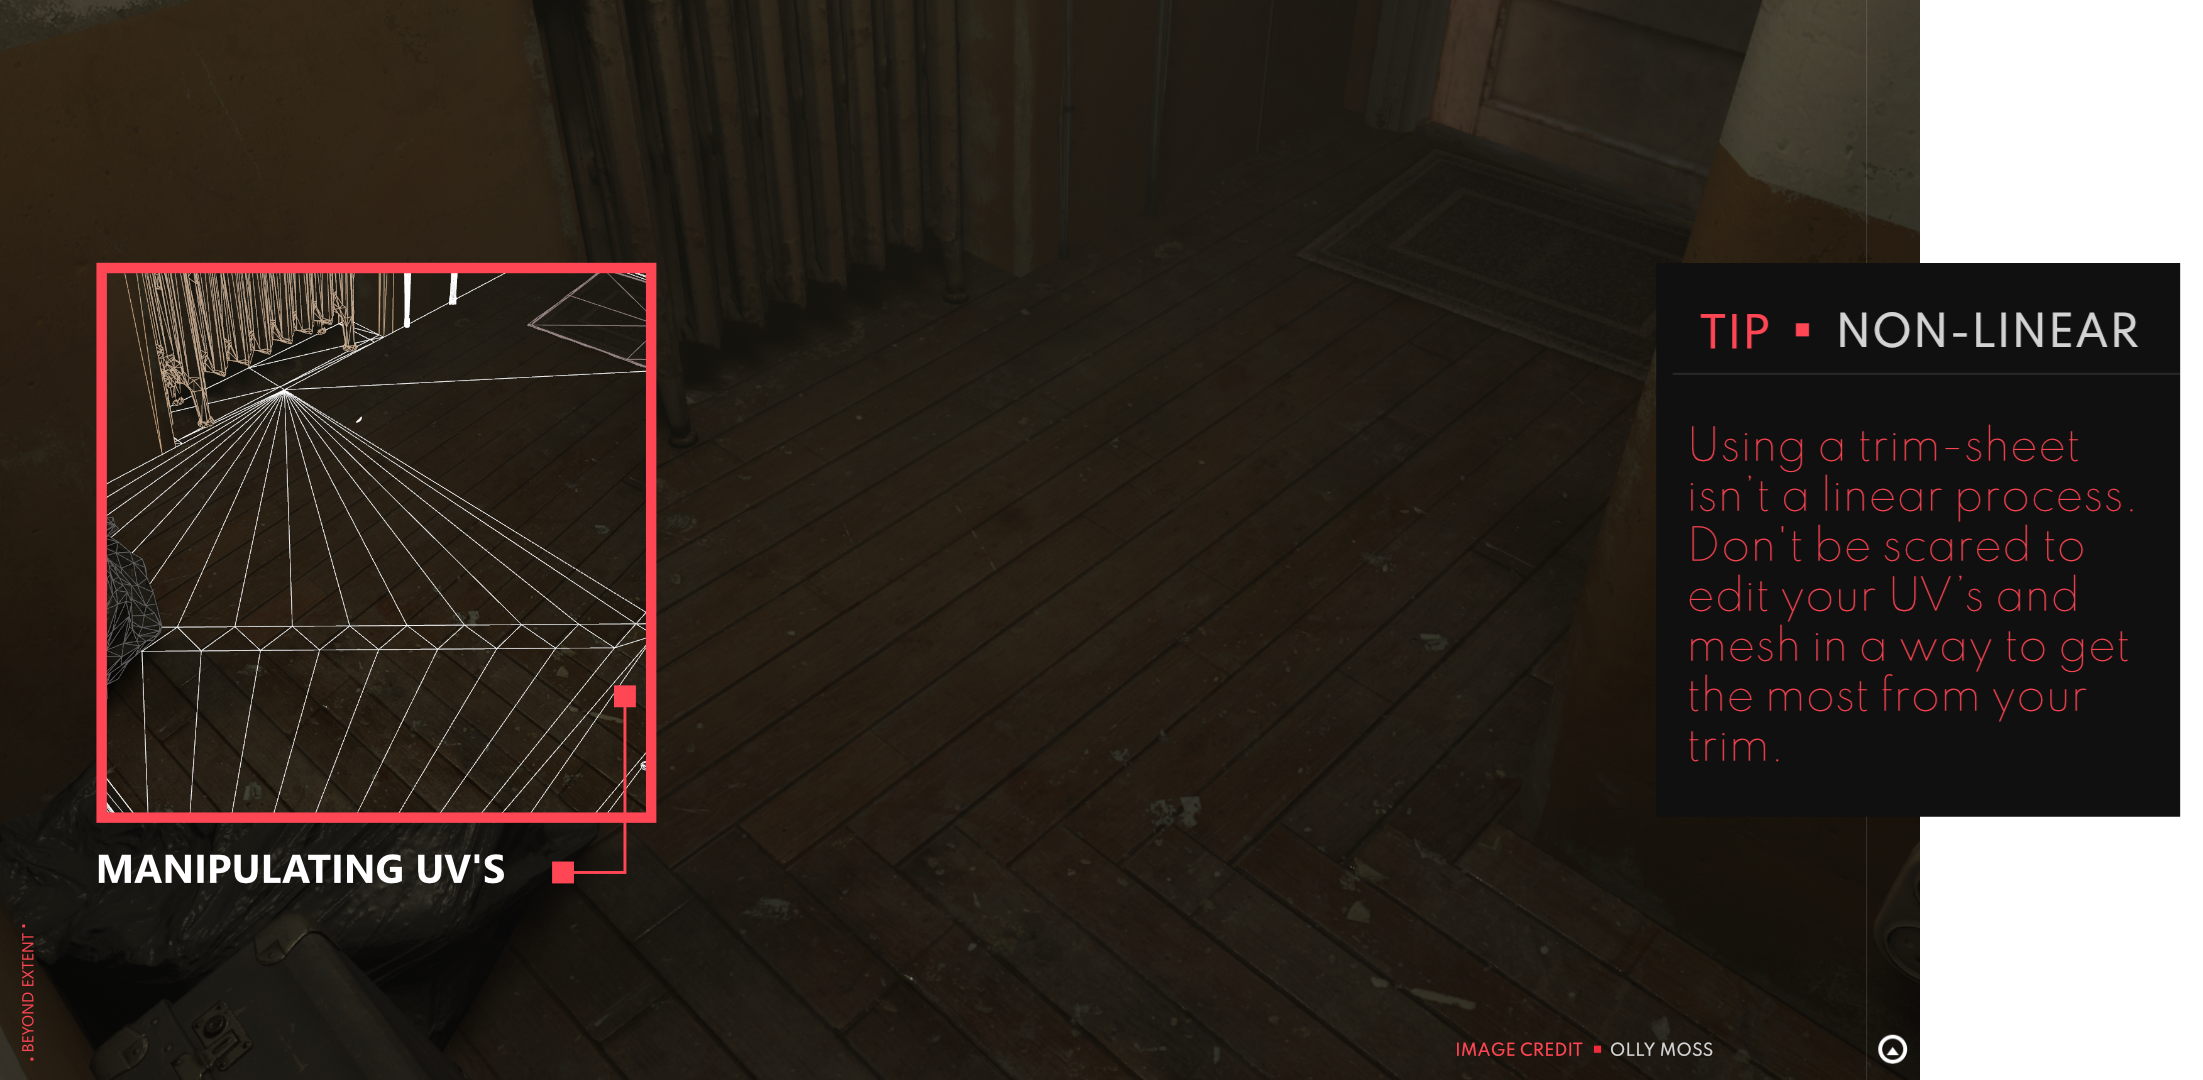
Fixing distortion on straightened UV’s
If you straighten your UV shells it makes them significantly easier to map to your trim sheet. This may in some cases create a small amount of distortion in the appearance of your texture on the mesh, however this cant really be avoided, but with some work can be minimised.
Adding additional edge loops to minimise distortion.
The more geometry you have, the less your texture map will be stretched, especially on curved, more complicated geometry. If possible you could also model your geometry in a straight orientation and add the curve afterwards using a bend modifier, this might not be possible in more complicated scenarios but would work in more simple examples.
Making the most of geometry
Build understanding
Once you do a couple assets with the trim, you’ll hopefully start to build an understanding of the strengths and weaknesses of your trim sheet. Use this knowledge to then start tailoring your asset to get the most from your trim sheet.
Observation
Observe your trim, identify elements which could be enhanced by having supporting geo and let your trim inspire your design choices.
Using UV's
This is manipulating your geo and UV’s to fully maximise your trim sheet. Creating interlocking panelling is a more complex example, however a clearer example would be creating the crown moulding around a window.
what's a hybrid trimsheet
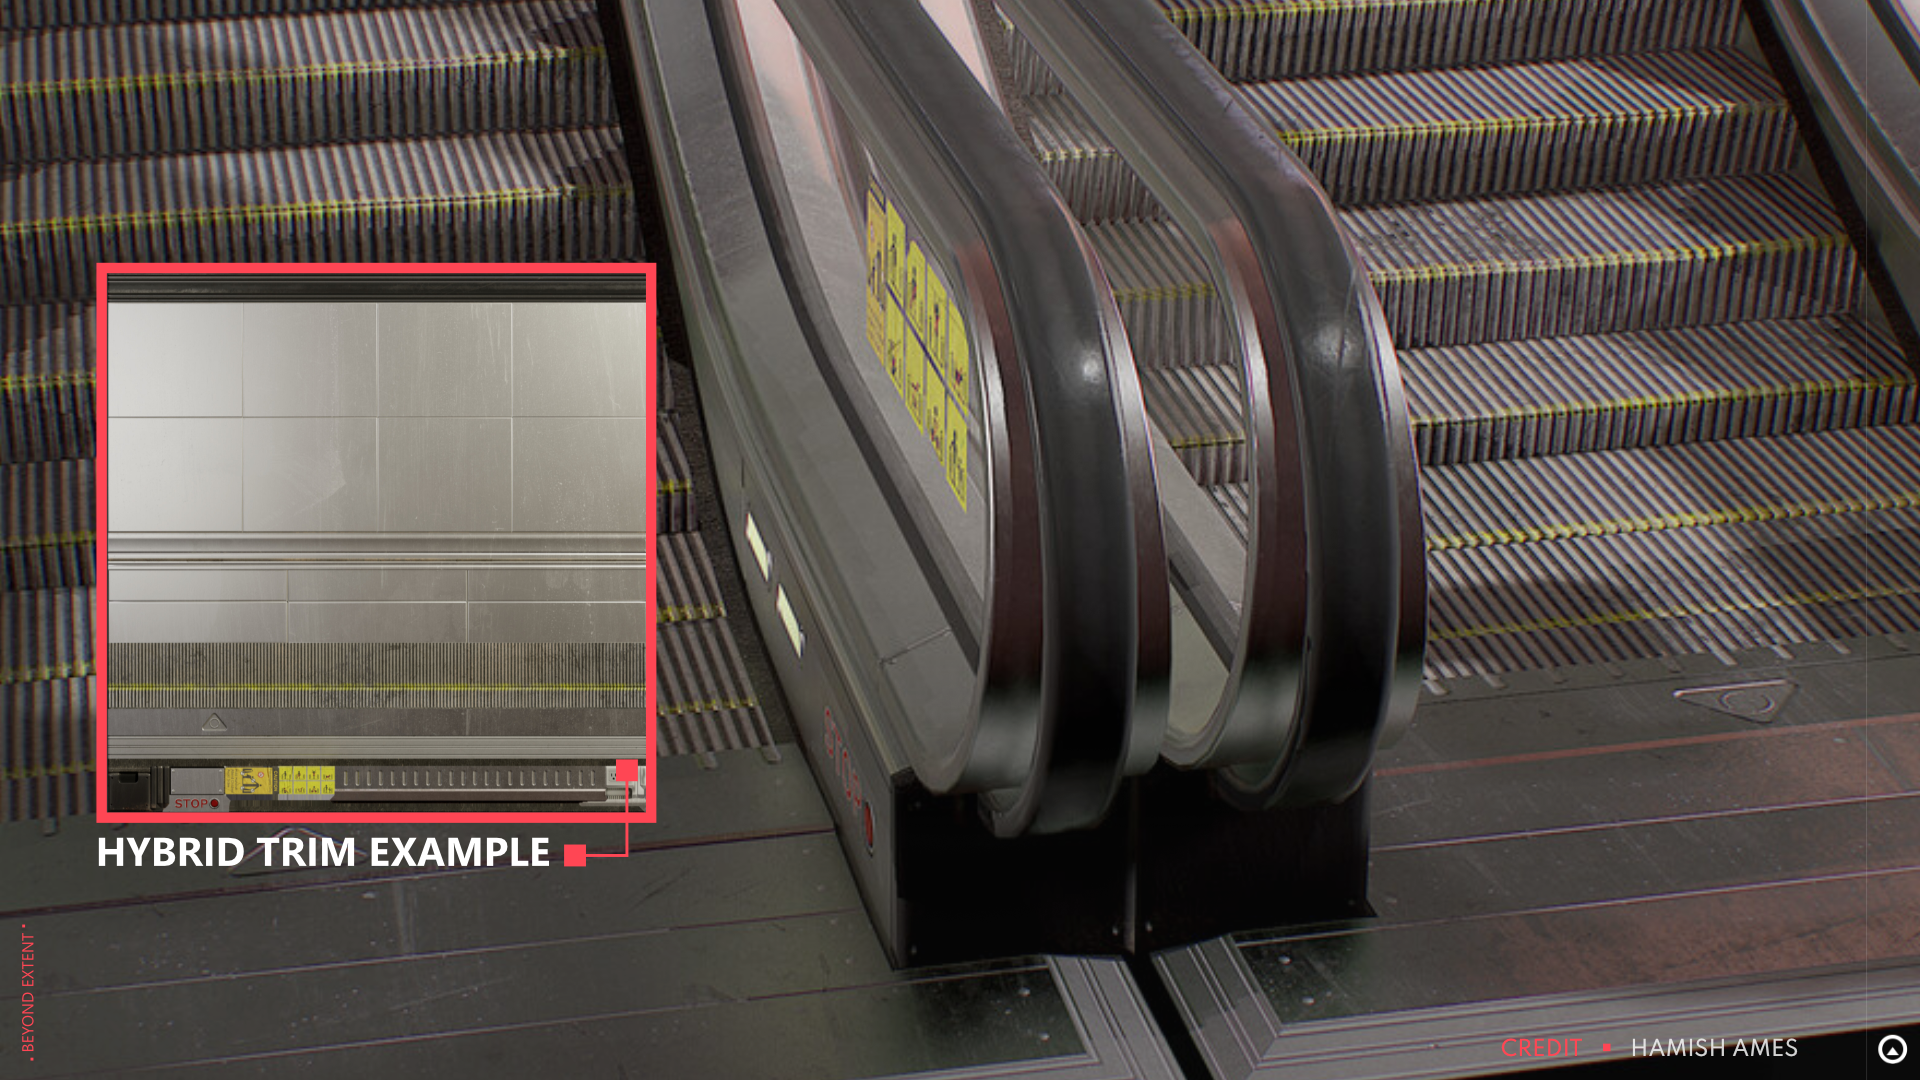
Hybrid trim sheets aren’t that different from a standard trim sheet, the main difference is a section of the UV space is being used by uniquely detailed, non tiling elements.
For example if you had a wooden trim sheet you were using to create some wooden shop fronts, you could then reserve a section of the trim sheet to bake your door handles, post-boxes and other unique assets onto, this is where the hybrid name comes from as you are essentially merging both trim sheets and unique baked elements onto the same texture set.
You could in theory use your hybrid trim sheet for assets you didn't originally intend it for, however its usually better for sets of assets which are designed to to be frequently used together.
If you are eager to learn more about the hybrid workflow, check out our workshop with Hamish Ames about Hybrid Trimsheets! - Link
Combining techniques
Another method in which you can utilise trims is essentially the reverse of the previous section, If you create a uniquely baked wooden bucket, while keeping an empty space on the side of your 0-1 UV space. You can then insert a tileable rope trim element within the empty space you left, this essentially creates a hybrid trim which is mostly uniquely bake with an extra section with can be reused, in this case for all the rope elements you add to the bucket model.
technical Benefits
By just using one texture for a large collection of assets you are reducing draw calls and memory required to load the textures. This is possibly a bit too technical so below is an example which highlights the benefits of a trim sheet in a simpler form.
In general throughout a scene you will have multiple dozens of assets. Each of these assets will have their own texture sets, if we assume each asset has its own texture set that's 3 textures for each asset in the scene on average. Clearly this would result in a lot of textures, as an example 12 assets would result in 36 textures, comparatively with a trim sheet you could potentially texture all of those assets with 3 textures.
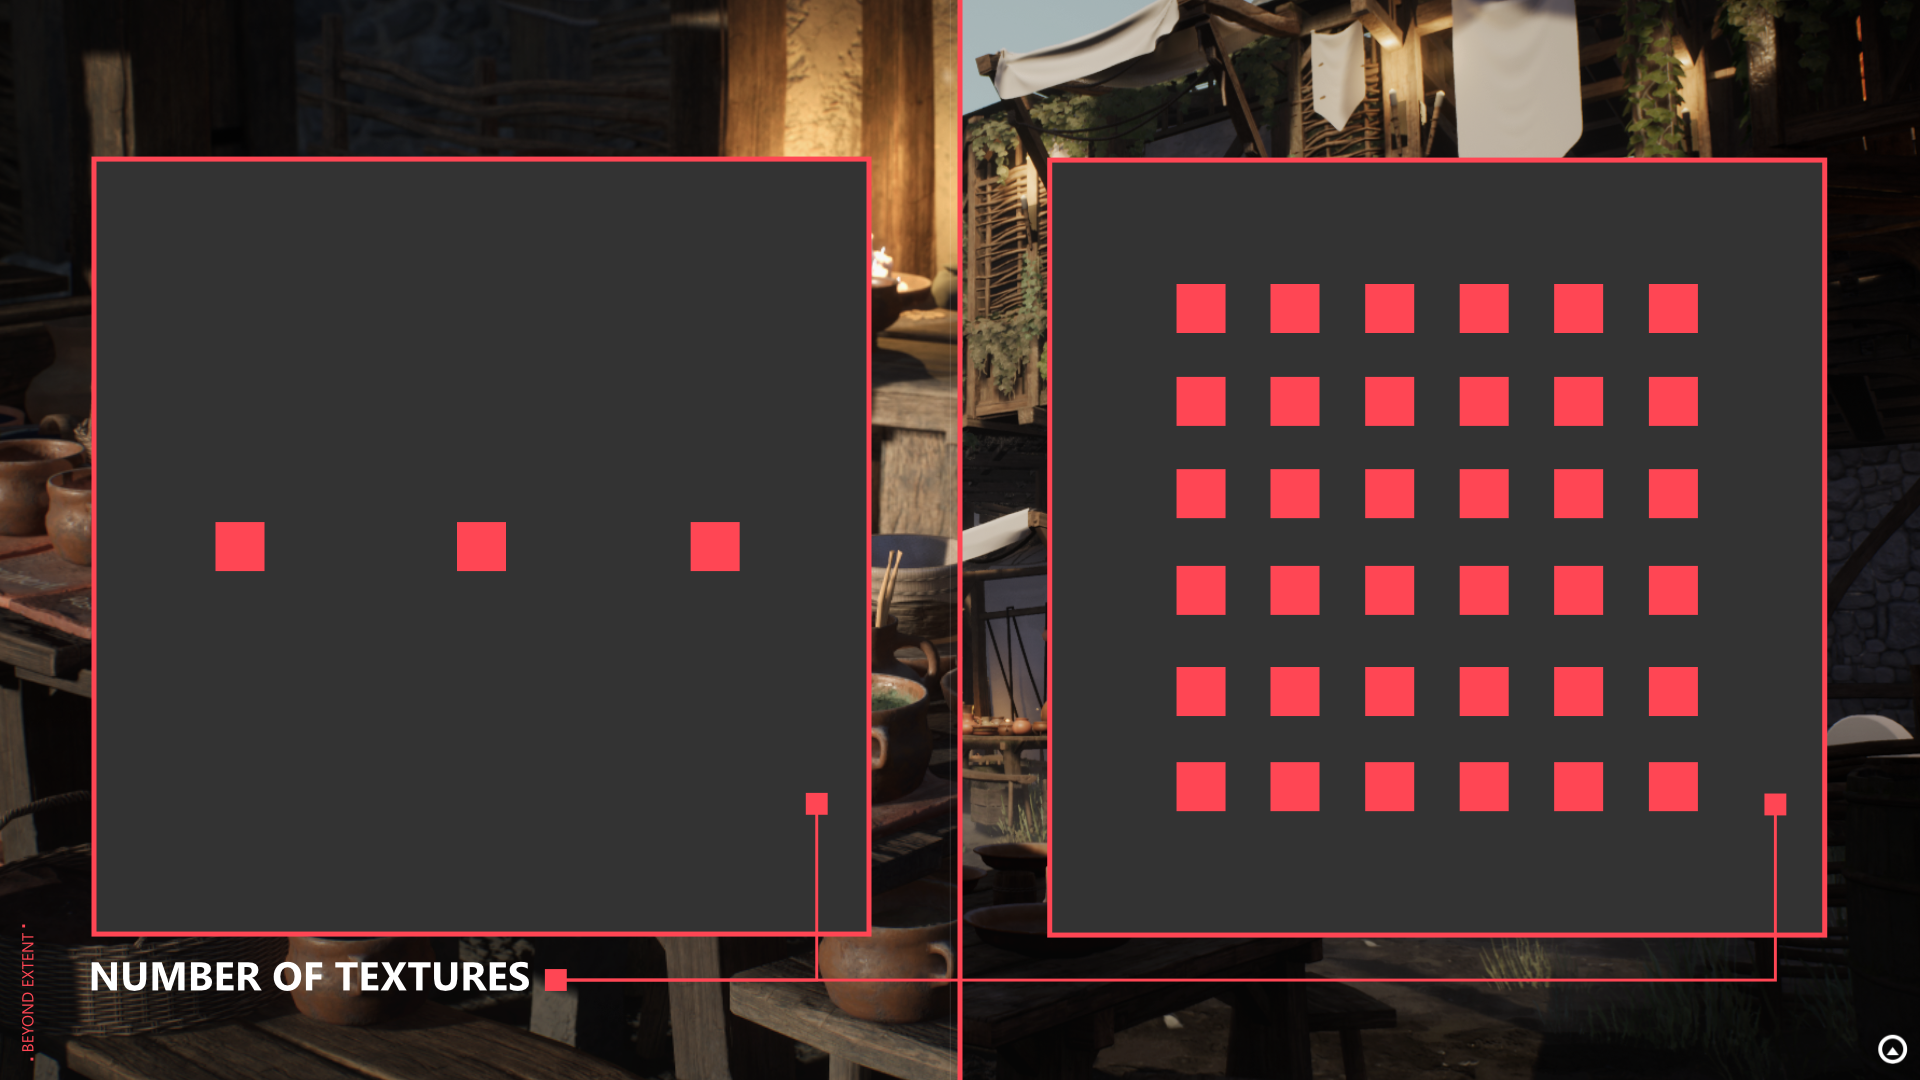
Obviously in this extreme case using a trim is more performant purely based on comparing the difference in the number of textures needed. However, you will probably have a mixture of unique and trim assets in reality, but a trim should go a long way at reducing the amount of textures needed in your scene. On top of that you could combine multiple assets onto the same texture set which also would further reduce the amount of textures needed.
I will stress that reducing your texture amounts probably isn't something you need to worry all too much about while doing personal work, however its certainly good to keep in mind as a consideration.
SOURCES
- Olly Moss, Half-Life Alyx Example (https://twitter.com/ollymoss/status/1282389828353396737?s=20&t=KItQ79muiCsYqzEVyuQuzA)
-Beyond Extent: Tips and Tricks (https://www.beyondextent.com/)
- Hamish Ames, Hybrid Trim Tutorial (https://www.artstation.com/marketplace/p/jdMO/escalator-hybrid-trim-pdf-tutorial)
- Beyond Extent, Hybrid Trimsheets with Hamish Ames (https://www.youtube.com/watch?v=jzj1D7pyILI)
support us
All these resources are curated and made by artists and then made available through the help of all our supporters.
If you want to support us on our mission to make the your journey into environment art as easy as possible then you can do so by joining us, and we will give you a lovely community and more exclusive resources in return.